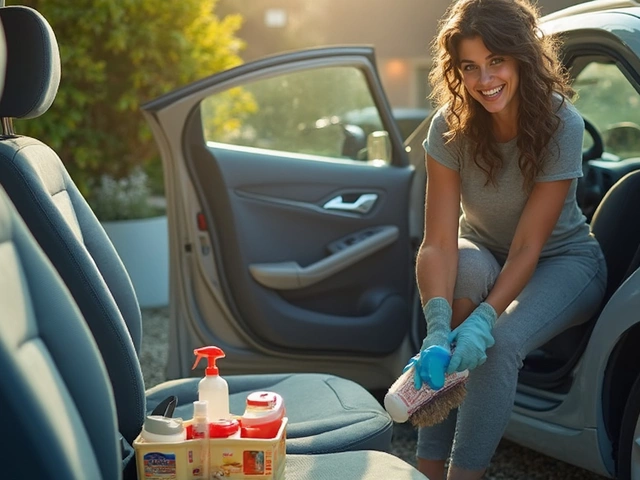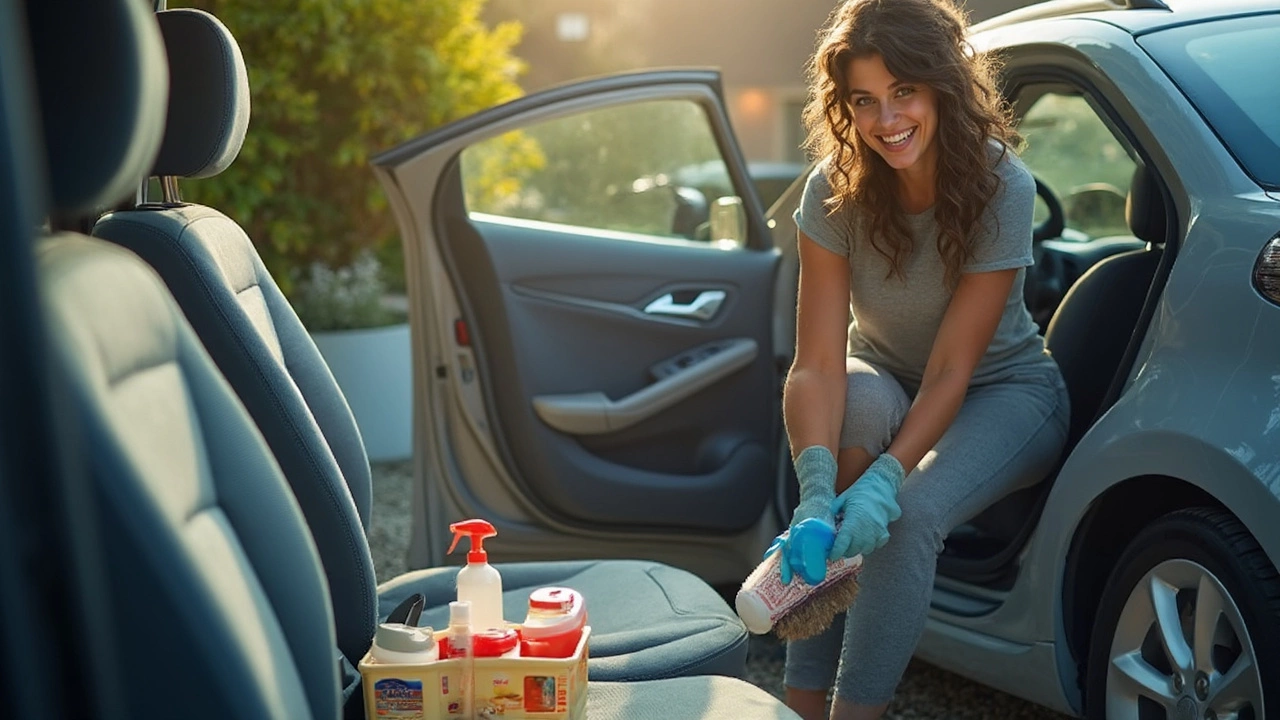
Ever sit in your car, get a whiff of old fries, and think, how do some people keep their rides spotless? Here’s the thing: pro-level interior detailing isn’t magic—it’s all about process and patience, not a $200 detailing kit.
Start with what you’ve got—shop vac, a few microfiber cloths, soft brushes, an old toothbrush for the nooks, and a pH-neutral cleaner (nothing wild, just skip the kitchen spray). Even household stuff like baking soda or an empty spray bottle for water and vinegar works wonders. The main trick? Don’t go overboard with products, and always test a small spot first. The wrong cleaner can make plastic tacky or stain your seats forever.
People often rush and end up just shuffling around old crumbs. Work from top surfaces down, finishing with the dirtiest sections. That way, when dust drops or gunk falls, you catch it later instead of chasing it twice. Pay attention to vents, cup holders, and that awkward spot between the seats—these hide more weird junk than you think.
Trust me, detailers spend half their time on small details: that sticky steering wheel, the window switches, the rear-view mirror edge. Little things add up, and once you go over them, you’ll wonder why you ever paid someone else. Let’s get into the specifics and break down each part without missing a spot.
- Gather the Essentials: Tools and Products
- Declutter and Pre-Clean the Surfaces
- Deep Clean Seats, Carpets, and Mats
- Dash, Vents, and Hard-to-Reach Areas
- Glass, Screens, and Touch Points
- Pro-Level Finishing Touches and Maintenance
Gather the Essentials: Tools and Products
Before you even think about cleaning, it’s smart to get all your gear together. Making multiple trips back and forth to your garage kills motivation fast. For a solid car interior detailing session, here’s what you actually need—nothing more, nothing less:
- Vacuum cleaner: Preferably with attachments for cracks and corners. Even a regular shop vac with a brush head beats most car vacuums you see online.
- Microfiber cloths (at least 4): Skip paper towels. Microfiber grabs dust and is gentle on screens and touch points.
- Soft and stiff brushes: A detail brush for plastics and vents, and a stiffer one for carpets and mats.
- Old toothbrush: Perfect for tight seams and those window switches with grime buildup.
- pH-neutral all-purpose cleaner: Look for “interior safe” on the bottle. No bleach, no ammonia.
- Glass cleaner: Go for ammonia-free on tint and screens.
- Spray bottle with water & vinegar (optional): If you’re going DIY and need something gentle for general wipe-downs.
- Plastic or trim protectant: Helps keep plastics from cracking or fading, especially if your car sits in the sun.
- Carpet cleaner or foam (optional): Good for stains, but if you don’t have one, a bit of diluted dish soap and water can pinch hit.
You don’t need to splurge on fancy products. A Consumer Reports test in 2023 even ranked a $5 store-brand all-purpose cleaner higher than most “premium” car brands for stain removal and safety on plastic. And those huge bottles of name-brand glass cleaner? Mostly water. Just stick with basics.
Check the bottle labels: anything not marked “interior safe” or “safe for screens” should stay far away from your dash. Using harsh household cleaners is one of the quickest ways to haze a screen or stain your trim.
Here’s a quick look at how some tools actually stack up in terms of effectiveness and price:
| Tool/Product | Average Price | What It’s Good For |
|---|---|---|
| Microfiber Cloths | $10 (pack of 12) | Dust, screens, polish |
| Detail Brushes | $7 (set of 3) | Vents, buttons, crevices |
| Shop Vac | $40-$80 | General vacuuming |
| pH-Neutral Cleaner | $6-$12 | Plastic, vinyl, leather |
Gather all this before you start, stick everything in a bucket or tote, and you’re ready. No fancy detail shop required—the right basic tools go much further than most people think for DIY car cleaning.
Declutter and Pre-Clean the Surfaces
Before you even touch a vacuum, get rid of all the trash and stuff hiding in your car. You’d be surprised how quickly wrappers, receipts, and random water bottles pile up. This isn’t just about making things look tidy—extra junk makes car interior detailing ten times harder. Grab a garbage bag and a box for things you want to keep.
- Check under the seats and in the seat cracks. You’ll probably find coins, pens, and a few mystery items you forgot about.
- Don’t skip cup holders, door pockets, glove box, and even the trunk if you’ve got time. Phones, earbuds, or sunglasses always turn up in the weirdest places.
- Take out floor mats and seat covers—they collect most of the dirt. If it isn’t bolted down, remove it. Easier to clean everything this way.
Move on to a quick DIY car cleaning by wiping off loose dust and dirt. A dry microfiber cloth works best, so you’re not just smearing grime around. Hit the dashboards, doors, and center console. If things look super dusty, a soft brush loosens it up, especially around vents and plastic trim.
Here’s an odd fact: researchers found that steering wheels can be up to four times dirtier than a public toilet seat—yup, that gross. Just makes you want to scrub everything, right?
This pre-clean sets the stage for deeper cleaning. By removing junk and surface dust first, you’re not just pushing dirt around in the next steps. Always remember, working from clean to dirty saves time and gives better results.
Deep Clean Seats, Carpets, and Mats
This is where your car transforms from "kind of clean" to "wow." People forget how much dirt gets stuck under seats or ground into fabric. When detailing your car interior, seats and carpets need a different kind of attention than the dash or doors.
Start by yanking out the floor mats. Bang them outside to shake out the sand and stones. For rubber mats, just hose them down and use a stiff brush with a bit of dish soap. Cloth mats? Hit them with a vacuum first, then spray with some carpet cleaner, scrub, and rinse well. Make sure they're dry before you put them back so you don't end up with mildew.
Now, attack the seats and carpet. Move the seats all the way forwards and backwards. You'll be shocked at what hides underneath—pens, coins, fries, even the occasional missing earring. Use a shop vac or your regular household vac with a thin nozzle to yank out all the loose stuff.
- If you've got fabric seats, spray lightly with upholstery cleaner, then scrub gently with a medium-bristle brush. Avoid soaking the seat—too much water just encourages odors and slow drying. Keep a dry microfiber handy to blot up the grime.
- For stains, a mix of one part white vinegar to three parts water works for most spills. Don't oversaturate; a little dab and scrub does more than drowning the seat.
- If you have leather, faux leather, or vinyl, you need a pH-neutral cleaner (never hard chemicals). Spray the cloth, not the seat, and wipe—never scrub. Condition leather after for that soft, rich finish.
| Surface Type | Best Tool | Recommended Cleaner |
|---|---|---|
| Fabric Seats | Vacuum, soft brush | Upholstery foam or vinegar mix |
| Leather Seats | Microfiber cloth | pH-neutral leather cleaner |
| Carpets/Mats | Stiff brush, vacuum | Carpet shampoo or diluted dish soap |
Pro tip: Hit those carpeted areas with a light spray, scrub in circles, then use a wet-dry vac to suck up the moisture instantly. According to a 2023 auto care survey, about 42% of unpleasant car odors come from carpets and seat foam never fully drying out.
Finish by double-checking seams, seatbelt slots, and the gap where seat backs meet the base—these spots trap junk. Once you feel everything's dry and looks fresh, mats go back in last. This whole process sounds involved, but it changes your whole interior car styling game for weeks to come.
Dash, Vents, and Hard-to-Reach Areas
The dashboard brings everything together when it comes to interior car styling. Dust, fingerprints, and crumbs collect here like it’s their job. If you just wipe the top and call it done, you’re missing a whole layer of grime.
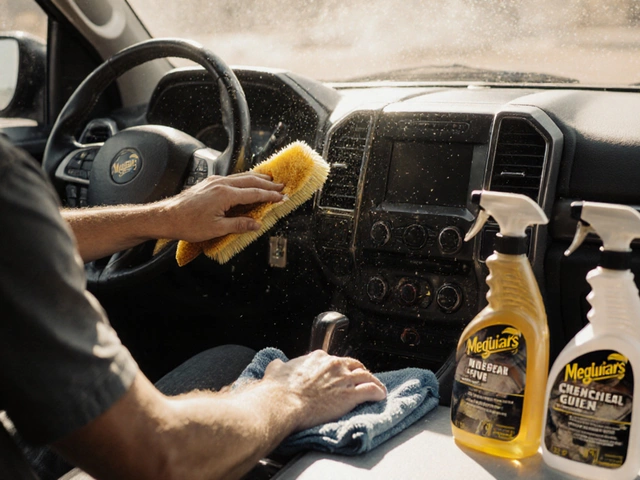
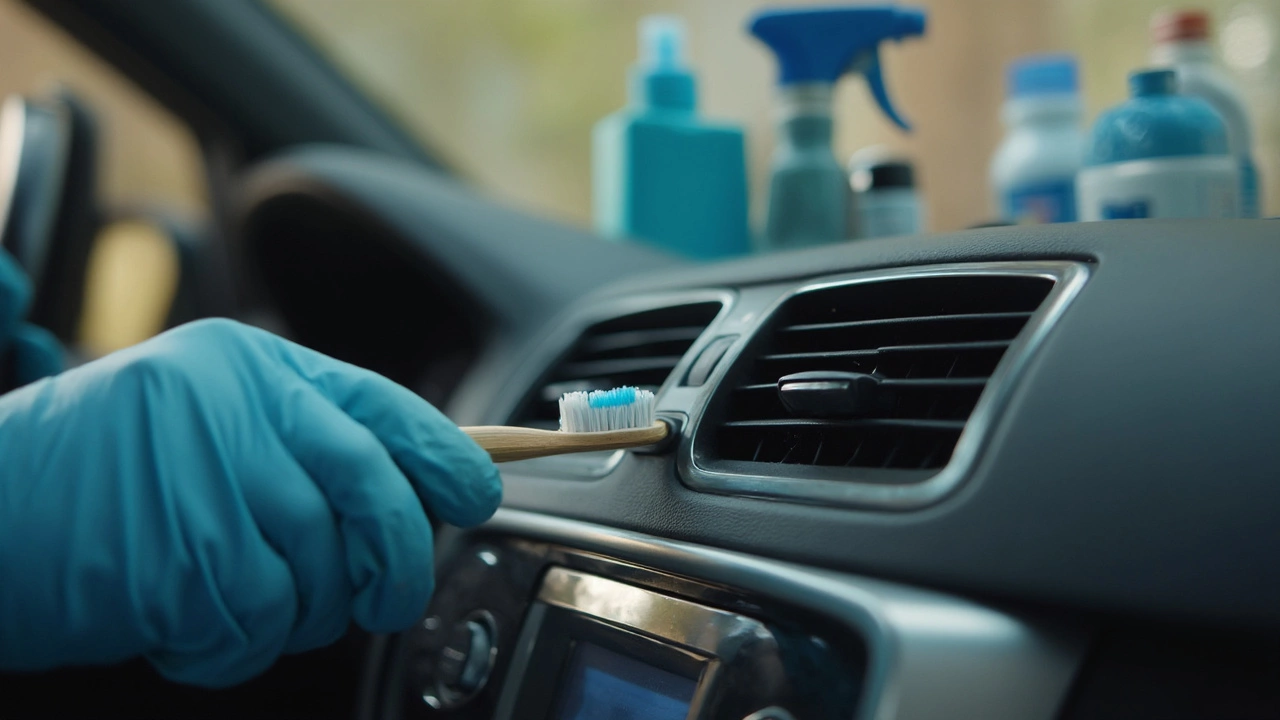
Start with an air duster (the canned kind you use for keyboards) or a soft detail brush to blast out dirt from vents. A lot of detailers use foam paintbrushes or makeup brushes for vents because they reach places your fingers never will. If you don’t have those, grab an old soft-bristled toothbrush and gently agitate dust in and around the vent slats.
For tight spaces like buttons, dials, or where the dash meets the windshield, wrap a microfiber towel around a plastic butter knife or popsicle stick. Run it along tight seams to pick up the gunk everyone else leaves behind.
Don’t skip under the dash. Junk tends to build up near pedals and in footwells. Move your seat all the way back, use your vacuum’s thin attachment, and suck out everything hidden there. For sticky spots on plastics, spray a bit of pH-neutral cleaner onto your cloth first (never directly on electronics or screens) and wipe gently.
Here’s a super handy cheat sheet:
- Use soft brushes for vent grates—don’t jab, just flick the dust out.
- Compressed air knocks out stuff you can’t reach by hand.
- Wrap a cloth around a thin stick for narrow seams.
- Never spray cleaners straight on the dash; spray the cloth instead.
- Treat plastic and vinyl with a UV protectant in the end, but go easy—too much can make surfaces sticky.
- Remember to clean the tops of steering wheel spokes and stalks. They’re fingerprint magnets.
Did you know the average car vent can hold over 400% more dust than a typical home air vent? That’s why a monthly blow-out makes a big difference for both looks and air quality.
Keep a couple of soft brushes and a microfiber towel in your glovebox for quick touch-ups. Staying on top of these small spots keeps your DIY car cleaning from turning into a big weekend project again and again.
Glass, Screens, and Touch Points
This part trips up a lot of people. Tackling your windows, infotainment screens, and anything you touch (steering wheel, shifter, handles) really sets off that interior car styling vibe.
For glass, skip the all-purpose cleaner and never use anything with ammonia. Ammonia can ruin tint and leave those wild streaks, especially if you have factory or aftermarket tint. Use a proper automotive glass cleaner or even a 50/50 mix of distilled water and vinegar in a spray bottle. The trick? Two clean microfiber towels—one damp for wiping, one dry for buffing. Work in sections. Roll your windows down an inch to get that upper grime stripe people always forget.
- If you spot streaks in sunlight, try wiping vertically outside and horizontally inside—helps you figure out which side needs a re-do.
- Use a soft brush to dust vents and crevices at window edges.
Screens need more care. Never soak—liquid can seep in. Instead, lightly dampen a microfiber cloth with just water or a screen-safe solution (most laptops/phone sprays work fine here). Don’t press hard or use paper towels; they scratch surfaces fast. Fingerprints and dust go away with gentle swipes. Some screens have anti-glare coatings, so make sure to check your car manual first if you aren’t sure.
On to car interior detailing staples: all the touch points. Did you know steering wheels often hold more germs than public toilets? It’s gross but true. Use a gentle all-purpose cleaner or diluted soap water, spray onto a cloth, not directly on the plastic or leather. Wipe down door handles, start buttons, and the shifter. For leather areas, go with dedicated leather wipes — too much liquid is bad for them.
| Touch Point | How Often to Clean |
|---|---|
| Steering Wheel | Once a week |
| Screen/Infotainment | Every 2 weeks |
| Door Handles | Every week |
Make these spots part of your regular DIY car cleaning routine. If you eat in your car or have kids, double the frequency. It’s the little stuff that takes a car from “pretty clean” to “did you get this detailed?”
Pro-Level Finishing Touches and Maintenance
This is where you turn regular cleaning into pro detailing. Ever wondered why some cars just look next-level? It’s all about the finishing touches and keeping it up, not just doing it once and calling it a day.
First up: conditioning surfaces. Leather seats love a quality, pH-balanced leather conditioner—keeps them from cracking and makes them feel soft, not slippery. Use it sparingly, buff it in, and wipe off extra with a clean microfiber. For vinyl and plastic, a dedicated protectant stops fading and cracking, especially if you park outside a lot. Don’t use oil-based products; they attract dust and leave things shiny in a tacky way. Stick to water-based formulas.
Fabric seats and carpets are magnets for new stains. Try a fabric guard spray after cleaning—this stuff puts an invisible shield over the fibers. That way, the next coffee spill won’t become a permanent memory. Always check that your product matches your materials, though, to avoid weird residue or discoloration.
Smell matters. Instead of masking odors, air out the cabin by leaving the doors open for at least 15 minutes, or run the A/C on recirculate with a cabin air filter change. Studies show that interior air can get pretty stale—cabin filters clog up fast and should be swapped every 12,000 to 15,000 miles. Here’s a quick table for reference:
| Item | Recommended Replacement |
|---|---|
| Cabin Air Filter | Every 12,000-15,000 miles |
| Leather Conditioner | Every 3-6 months |
| Fabric Guard | After deep cleaning |
Finish up with glass. Even after a cleaning, you’ll spot streaks if you use the wrong towel. Go for a dedicated glass microfiber (the short weave kind), spray cleaner on the towel—not the glass—and use a second towel to dry. That seriously cuts down on those annoying streaks and haze that only show up at night.
Stay on top of things with a quick vacuum and wipe-down every couple weeks. Toss trash and fast-food wrappers before they pile up. The more often you hit the basics, the less you’ll dread detailing day next time—and the closer your ride stays to that showroom vibe. If you make this a habit, the inside of your car won’t just look styled—it actually feels brand new, every drive.