Ever slid into your car just to spot crumbs, dust, or last week’s coffee stain? You’re not alone. A pro-level car interior isn’t about expensive magic products; it’s about using the right stuff in the right way. First off, never start without gathering everything you need—microfiber towels, a vacuum (with a few attachments), soft brushes, interior cleaner, and glass spray. Nothing kills momentum faster than running to grab something mid-clean.
Before you get into deep cleaning, clear out all the trash. And not just the obvious fast-food wrappers—dig through cupholders, under the seats, and door pockets. When you clear everything out, you won’t miss hidden spots, and you won’t end up spraying cleaner all over your gym bag or spare change. This prep work is what sets pros apart from weekend warriors.
- Gather the Right Tools and Products
- Remove Trash and Unclutter Everything
- Vacuum Like You Mean It
- Deep Clean Seats, Carpets, and Mats
- Wipe and Shine: Hard Surfaces
- Finishing Touches That Make a Difference
Gather the Right Tools and Products
If you want to detail your car like a pro, you need the right gear. You can’t fake it with an old rag and dish soap. Real detailers build a kit, and they use it every time. Let’s break down what’s worth grabbing before you even pop that vacuum out.
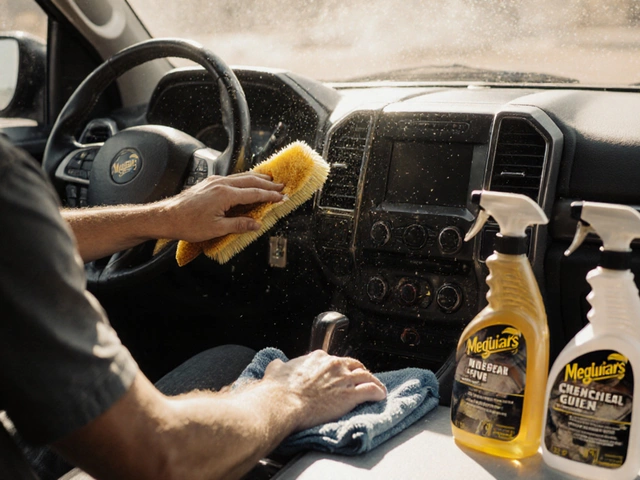
- Car interior detailing starts with microfiber towels—skip the generic ones from the dollar store. Go for plush, lint-free towels to wipe glass, plastics, and leather without leaving streaks or scratches. Get a few extras so you don't cross-contaminate grease and clean surfaces.
- Vacuum with attachments: A basic vacuum won’t cut it. Look for something with a crevice tool, brush attachments, and maybe even a tiny turbo tool. Those help you reach places like under the seats, air vents, and tight corners that collect the most junk.
- Soft detailing brushes: You need both a stiff-bristled brush for carpets and a softer one for vents and buttons. Professional detailers swear by boars hair or synthetic brushes—these don’t scratch but dig out dust and crumbs fast.
- All-purpose interior cleaner: Forget household cleaners, they can stain or dry out surfaces. Grab a cleaner designed for automotive interiors—3D, Chemical Guys, and Meguiar’s make good stuff that’s safe for most materials.
- Glass cleaner: Use an ammonia-free glass spray for windows and screens. Regular glass cleaner can damage tint and touchscreens—check the label, especially if your car has aftermarket film.
- Carpet and upholstery cleaner: Go with a foam or spray designed for automotive fabrics. If you have leather seats, use a cleaner and conditioner made just for leather—don’t reach for saddle soap unless the label says it’s car-safe.
- Extra bits: Cotton swabs, toothpicks, and compressed air cans are lifesavers for tiny spaces like buttons and seams. Pro tip: Pick up a few old squeeze bottles for diluting cleaners and easier spraying.
Round up these tools before you start and you’ll get through the job faster, with better results. Plus, you won’t have to make a single run back to the garage while cleaning. That’s how the pros do it—efficient, prepared, and always armed with the right stuff.
Remove Trash and Unclutter Everything
The first step for any car interior detailing job is so simple you might roll your eyes: getting out all the junk and random stuff you’ve been carrying around. According to a 2022 survey from the Car Care Council, more than 60% of drivers admit to having trash or loose items cluttering up their car’s interior on a regular basis. That extra clutter isn’t just ugly—it makes cleaning way harder and can even be a safety risk if things slide around during hard stops.
So, take a trash bag and tackle everything. Look in obvious spots like the seats, floor, and door bins—but don’t forget gloveboxes, seat-back pockets, and under the seats where a shocking amount of junk hides. Seriously, you might find things you forgot you even owned. Take out reusable items like charging cables, sunglasses, receipts, or anything else you actually want to keep, and set them aside for sorting later.
- Start at the top—look at visors, dash cubbies, and shelves by the windshield.
- Move to the center console and cup holders; you’ll usually find old straw wrappers or coins hiding here.
- Slide the seats all the way back to catch items that slipped underneath.
- Pop the glove compartment and empty out expired documents and takeout menus. (You’d be surprised how many people leave these behind for years.)
- Check seat-back pockets, especially if you have kids—snack wrappers love these spots.
| Common Spots Missed | Why It Matters |
|---|---|
| Under seats | Hides debris that can ruin vacuum cleaners |
| Between seat cracks | Collects crumbs and dirt—feels gritty after cleaning |
| Rear cup holders | Sticky residue pulls in more dust |
| Side door pockets | Old bottles leak and stain lining |
Once everything is out, you’ll see dust and junk you couldn’t reach before. With all that out of the way, the next steps—like vacuuming and deep cleaning—will actually work, instead of just swirling dirt around. This simple step is where pros start, because skipping it just means more work and a half-baked result.
Vacuum Like You Mean It
This is where most folks start getting lazy, but trust me, a solid vacuum job makes all the difference. Dirt and grit get right into seams and crevices, and if you skip this, you’re just covering up the mess. Grab a vacuum with a narrow nozzle and a brush attachment—these really get deep into the hard-to-reach spots.
Start from the top and work your way down, so you’re not dropping dust on already cleaned spots. Hit the dashboard, seats, and then focus on the carpets and floor mats. Don’t ignore those awkward areas, like between the seats and along edges where crumbs love to collect. If your seats move, slide them back and forth to reach every last bit under there. Even pro detailers admit the seat rails hide more junk than you’d expect.
- Use a soft brush attachment on vents, seams, and delicate trim to avoid scratches.
- For pet hair, a slightly dampened rubber glove or a pumice stone can pull up stuff your vacuum can’t touch.
- Always take the floor mats out. Vacuum both sides before putting them back; it stops that ‘slightly dirty’ smell from coming back.
If you really want every inch clean, pop off the headrests and move the seats. Reach into the seatback pockets and under child seats, too. This is what separates car interior detailing at home from just a regular tidy-up. When you’re down to the last crumb, you’re ready for the real cleaning magic next.
Deep Clean Seats, Carpets, and Mats
This is where the real transformation happens. Seats and carpets are ground zero for dirt, dust, and bad smells—that’s why pros spend extra time here. There’s science behind using the right cleaner: most interior fabrics trap more allergens than you expect, and some studies have shown that on average, car seats can host over 100 types of bacteria per square inch. Not great if you eat or drink in your car.
Start by taking out your floor mats and shaking them outside. Stomp on them a bit to loosen the deep-down grit—that stuff clings on tighter than you think. If the mats are rubber, give them a good scrub with a brush, hose them down, and let them air dry. For cloth mats, hit them with the vacuum first, then use a fabric cleaner spray. Let it soak, then scrub with a stiff brush and vacuum again if you can.
Now tackle the seats. Here’s the lowdown:
- Vacuum every inch, including cracks and seams. Crumbs like to hide between the seat and backrest, so switch to a crevice tool for those tight spots.
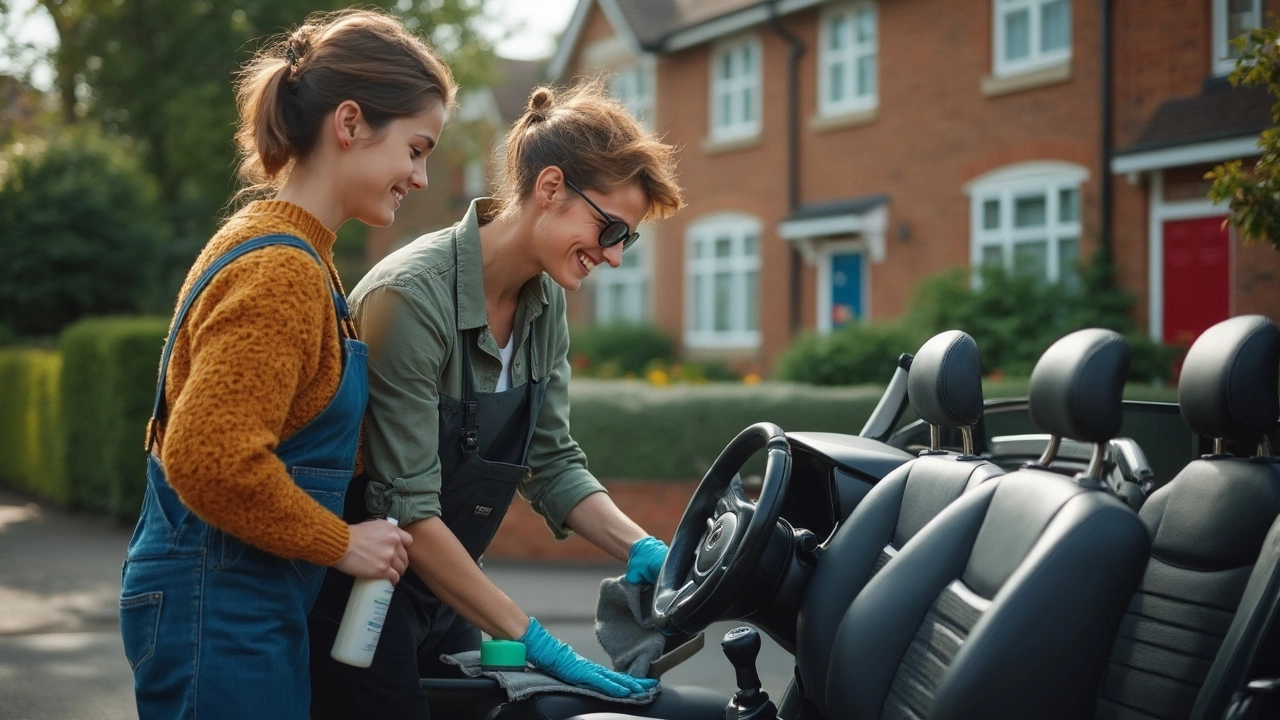
- Check the fabric. If it’s leather, use a leather cleaner (spray it on a microfiber towel, never straight onto the seat). If it’s cloth or suede, use a designated upholstery cleaner. Spray, let it sit for a minute, then scrub gently.
- For hated stains—think coffee or ketchup—dab, don’t rub. Blot with a clean towel after treating with cleaner. Rubbing just spreads it.
- Let everything dry completely before putting mats back in. Damp fabric invites mold, especially if your car is parked in the shade.
If you’re feeling thorough, toss in an enzyme odor remover for seats and carpet. These dig down and break up whatever’s causing any lingering stink—perfect for folks with pets or kids.
Wonder how pro detailers get that just-detailed scent? It’s a combo of deep cleaning and a quick shot of fabric freshener. But don’t overdo it. Too much can get cloying fast.
| Area | Average Dirt/Allergen Build-up |
|---|---|
| Seat Fabric | Up to 800,000 bacteria/sq. inch* |
| Floor Mats | Pollen, pet hair, mud, food crumbs |
| Seat Creases | Coins, crumbs, dust, hair |
*Data from a 2023 University of Nottingham car cleanliness study.
Focusing here gets you the most visible results and helps protect your car long term. Pro tip: Schedule this deep clean at least twice a year if you want to keep your car interior detailing skills top-notch.
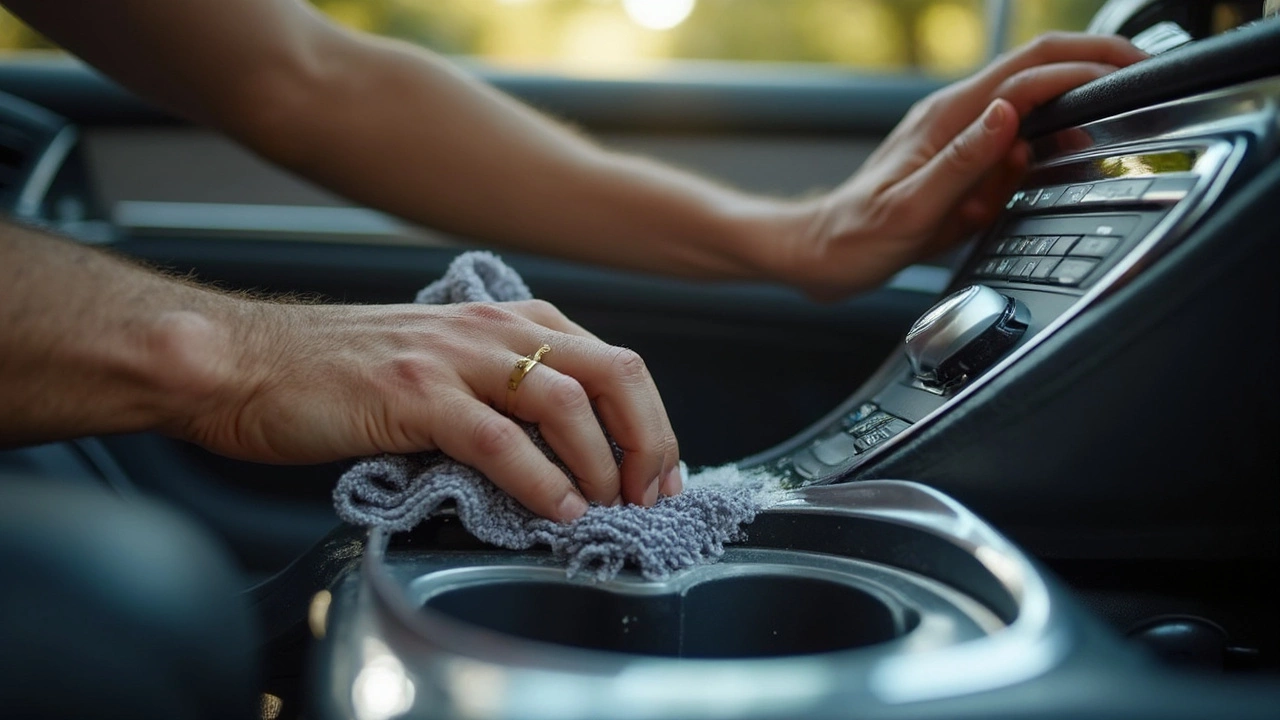
Wipe and Shine: Hard Surfaces
If you want your ride to look really fresh, you need to get the hard surfaces just right. Think about it: your dashboard, center console, door panels, and vents are in your face every time you drive. Even a tiny layer of dust makes everything look dull. Here’s how pros do it—no hype, just stuff that works.
First, always start by dusting. Use a soft brush or a dedicated interior brush—never a scratchy old rag. Compressed air helps blow out crumbs from cupholders and gunk from air vents. For dashboards, go for a quality all-purpose interior cleaner. Spray it on a microfiber towel (not directly on the surface—nobody wants overspray on nice leather or touchscreens) and wipe in one direction. The result is a streak-free finish, especially key if your aim is that *showroom fresh* vibe.
- Use a separate cloth for infotainment screens to avoid scratching.
- For tiny switches and tight crevices, an old toothbrush or soft detail brush is magic.
- Avoid silicone-heavy wipes—they leave a weird greasy film that actually attracts dust.
If you’ve ever wondered why pro-detailers love microfiber towels, it’s because they lift dust and trap grime instead of pushing it around. Here’s a quick look at how well they work compared to old-school cotton rags:
| Material | Dirt Pickup (micrograms/square cm) | Chance of Scratching |
|---|---|---|
| Microfiber | 924 | Very Low |
| Cotton Towel | 450 | Medium |
Don’t forget the cupholders—they’re the germiest part of the car. Wipe them with a cleaner-soaked brush or cloth, then dry. Air vents? Hit them with a foam swab, or even a paint brush, to clean out sticky buildup.
If your car has piano black trims, skip dry towels—use a very slightly damp microfiber, then buff gently to avoid swirl marks. The same goes for glossy touch screens. For that final pop, you can use an interior protectant, but make sure it’s not shiny. Matte finishes look way newer and won’t blind you when the sun hits the dash.
Professional tip: if you’re battling fingerprints on touchscreens or glossy trims, a basic glass cleaner on a fresh microfiber towel works wonders. Just remember, less is more. No one wants a slippery steering wheel or buttons that stick.
Dial in these steps, and the hard surfaces in your car interior detailing routine will honestly rival pro shops—minus the price tag.
Finishing Touches That Make a Difference
This stage is where your car goes from clean to showroom-level sharp. The little details are what people notice—things like shiny screens, streak-free glass, and that subtle fresh scent. You don’t have to buy professional supplies, but you do need to pay attention to the spots most people skip.
After you’ve wiped every surface and vacuumed the seats, focus on these steps:
- Car interior detailing always means streak-free windows. Use a good glass cleaner with a clean microfiber towel. Wipe vertically on the inside and horizontally on the outside—if you spot streaks, you’ll know which side they’re on.
- If your screens—like the infotainment or backup camera—have fingerprints, use a screen-safe wipe. No glass cleaner here; you could damage the coating.
- Dress the plastic and vinyl. An interior protectant restores faded color and protects from UV, which can crack dashboards with enough sun exposure. Go easy, though—nobody likes a slippery steering wheel or greasy look.
- Don’t forget the air vents. A small, soft brush or even a foam paintbrush gets the dust. For a bonus, add a couple drops of essential oil to a cotton swab and pop it in the vent for a subtle scent, not an eye-watering perfume blast.
- Finish with a quick check: run a lint roller over seats and cloth headliners to grab hair or stray fuzz that the vacuum missed.
Here’s what pros actually get asked about the most: lingering odors. Smoke, wet dog, or funky gym bag smells don’t just vanish with a spray. For stubborn scents, sprinkle baking soda on the seats and carpets, let it sit for a few hours (or overnight if you can), then vacuum it away. If your car still smells off, swap out the cabin air filter. Most people don’t realize it’s hiding behind the glove box, trapping dust and smells for years if you never change it.
Don’t forget about those little surprise spots—seatbelt buckles, cupholder rubber mats (which you can soak in warm, soapy water), and the area under the rear seats if they fold up. People tend to skip these, but this is how pro detailers set themselves apart.
| Spot | Cleaning Tip |
|---|---|
| Seat Tracks | Use a small nozzle attachment and brush for gunk |
| Steering Wheel Stitching | Gentle brush with diluted cleaner kills hand grease |
| Door Seals | Wipe with a damp cloth, then dry to prevent mildew |
| Pedals | Brush to dislodge debris, then wipe dry (no slippery products!) |
Once you check every nook, slide back the seats, and do one final walk-through with fresh eyes. Every time you do this, it gets easier, and your car holds onto that just-detailed look way longer.