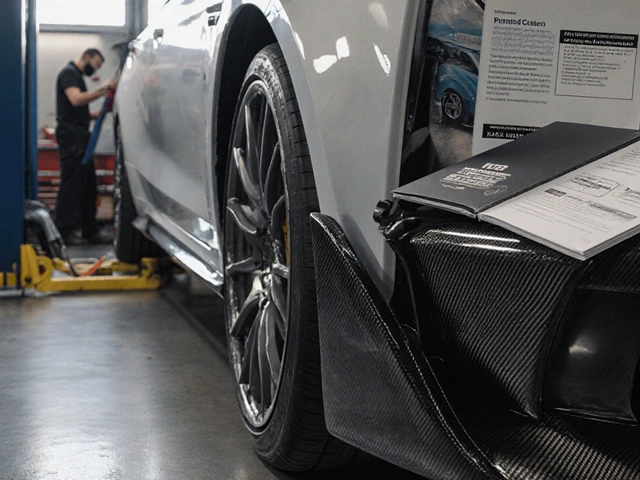
Think body kits just snap right on? Not quite. Even the so-called "easy" kits can hit you with surprises unless you know what to expect going in. Some bumpers and skirts fit like a glove, but plenty need a bit of convincing—or even some trimming—to line up just right with your car.
Skimping on prep is where most people trip up. Before you reach for a wrench, you've got to check your kit against your car piece by piece. Some kits come fresh out of the mold and need sanding or drilling before they even come close to fitting. And if your paint job isn't perfect? Any mistake stands out ten times more with a new kit.
Here’s the deal: if you’re handy with a socket set and patient enough to deal with the awkward bits, a basic kit can be a solid Saturday project. But for big installs or anything that needs paint matching and finessing, you’ll want to know exactly where to draw the line between DIY and professional help.
- What Goes into a Body Kit Install?
- Types of Body Kits: Easy and Tough Jobs
- Essential Tools and Supplies
- Common Problems and How to Dodge Them
- Should You DIY or Leave It to a Pro?
- Tips for a Smoother Install
What Goes into a Body Kit Install?
Installing a body kit is more than just bolting on new panels. It’s a mix of fitting, test fitting, prepping surfaces, and making sure everything lines up like it was meant to be there. The install process starts way before you even touch your toolbox.
First up, you’ve got to unbox each part and test fit it to your car. Plenty of people skip this, but it’s how you spot weird fits or missing hardware early. You might discover a bumper that needs a little trimming or side skirts that don’t line up perfectly with your original clips.
Next comes prepping your car. That means cleaning off any grime around the install area and usually removing stock parts—bumpers, fenders, or trim—depending on what kind of car mods you’re doing. Some kits need you to drill holes for screws or brackets, which gets nerve-wracking. Go slow, double-check your markings, and you’ll avoid extra headaches.
Not all kits are created equal. Polyurethane kits need to flex into place, fiberglass may crack if you wrestle it too hard, and ABS plastic is somewhere in between. Each material needs its own touch. You’ll use a combo of clip hardware, double-sided tape, and sometimes even rivets. Most kits are designed for a snug fit, but ‘universal’ kits are notorious for needing serious tweaking.
- Unbox and inspect each part for damage or defects
- Test fit on the vehicle before making permanent changes
- Clean and prep mounting surfaces
- Remove any stock panels as needed
- Mark, drill, or trim for a perfect fit
- Mount and secure using included hardware and tools
- Do a final check for even gaps and smooth alignment
Painting is usually done after you dial in the fit—but before the final install. And unless you’re a pro with a spray gun, paint matching rarely comes out perfect in your garage. A lot of headaches pop up around here, especially if you’re picky about how your exterior upgrades look.
Here’s a quick breakdown of what you might spend in time on different parts of a kit:
| Part | Time (DIY Average) |
|---|---|
| Front Bumper | 2-4 hours |
| Side Skirts | 1-3 hours |
| Rear Bumper | 2-3 hours |
| Spoiler/Wing | 1 hour |
If you’re after a show-quality finish, expect to double those hours and add time for paint work. Bottom line: installing car body kits is a hands-on process that demands patience and planning, not just tools and muscle.
Types of Body Kits: Easy and Tough Jobs
When it comes to body kits, not all installs are created equal. Some kits are a quick afternoon job, while others will keep you grinding for days. Here’s what makes the difference.
There are two main categories: bolt-on and custom-fit. Bolt-on body kits are designed for your exact make and model. Think front lips or side skirts you screw right into the factory mounting points. These generally take less work and fit better straight out of the box. They're perfect for beginners or anyone just dipping into car mods.
Then you’ve got the complicated stuff: fiberglass or widebody kits. These often need a lot of fussing to get right. We’re talking sanding, cutting, or even removing factory panels. Sometimes you need to mock up each piece, mark where you’ll need to drill new holes, and then adjust over and over. Custom kits almost always need pro-level paint blending—unless you're cool with obvious color mismatches.
The material also makes things harder or easier. ABS plastic kits tend to fit better and flex more, so they’re a breeze for DIY car projects. Fiberglass is lighter and can look awesome, but cracks or chips if you flex it too much. Polyurethane is nearly indestructible but sometimes sags if not reinforced right. Here’s a quick rundown to compare:
| Type | Difficulty | Fit | Paint Required? |
|---|---|---|---|
| Bolt-On ABS Plastic | Easy | Factory-like | Sometimes |
| Bolt-On Polyurethane | Medium | Good | Usually |
| Fiberglass Custom | Hard | Needs Much Work | Always |
| Widebody (Any Material) | Expert | Custom Only | Always |
Another thing: big-name brands usually mean less headache because their tolerances are way better. Cheap, off-brand kits save money but are notorious for wavy panels or holes that don’t line up, so budget for extra time no matter what the ad says.
The main takeaway? Simple exterior upgrades can often be handled in your garage, but the more aggressive and custom you go, the more skill (and patience) you’ll need. If you’re on the fence, look for install videos for your specific kit online—some brands even post their expected install time and steps so you know if it’s right for a DIY car project.
Essential Tools and Supplies
The difference between a smooth body kit install and a job that drags on all weekend usually comes down to your tools. Sure, some universal kits say you only need basic hand tools, but let's get real—most car mods need a few extra things to go right. Being ready with the right gear makes life ten times easier.
You’ll absolutely want these on hand:
- Socket set and ratchet—these come in handy for almost every bolt.
- Trim removal tools—use these to pry off old panels without messing up your paint or interior.
- Electric drill and drill bits—for any new mounting points you might need to make.
- Automotive masking tape—super important for test fits and to keep your paint safe while you're working.
- Sandpaper (medium and fine grit)—a lot of parts have rough edges, even on pricier kits.
- Adhesives or double-sided tape—most kits with lips and spoilers won’t stay on without some sticky stuff.
- Measuring tape and marker—sounds simple, but you’d be shocked how many crooked installs happen because this step’s skipped.
- Jack and sturdy stands—you’re lifting up the car for bumper or side skirt jobs.
If you're painting to match your new exterior upgrades, don't forget automotive primer, a paint gun or aerosol cans if you're going DIY, and clear coat for protection. By the way, painting outside of a shop pretty much guarantees some dust or runs, so factor that in.
Double-check the hardware that ships with your body kit. Some brands skip on quality, and a bag of cheap screws can save them money but cause you headaches. Swapping in stainless fasteners is cheap insurance against rust and loose panels down the road.
"In our survey, more than half of first-time installers said extra hardware and double-sided tape weren't included with their kit—even though the instructions called for it." – Modified Street Magazine, March 2024
If you want to see it at a glance, here’s a quick breakdown:
| Tool/Supply | Purpose |
|---|---|
| Socket set & ratchet | Removing and securing hardware |
| Trim tools | Panel removal without scratches |
| Drill & bits | New mounting points |
| Masking tape | Protect edges, layout guides |
| Sandpaper | Prep and smoothing |
| Adhesive/tape | Sticking parts that don’t bolt on |
| Jack & stands | Safe car access |
Don’t wait until parts are half-installed before realizing you need another tool or supply. Lay it all out before you start, and your DIY car project will go a whole lot smoother.

Common Problems and How to Dodge Them
Body kit installs aren’t always smooth, especially if it's your first time messing with body kits. Here are the most common headaches and, more importantly, how to get around them.
- Poor Fitment: Lots of kits, especially the cheaper ones, aren’t made perfectly for your model. You might need to sand, trim, or even heat gun some edges just to get the parts to line up. Always test fit every piece before painting or drilling holes. Otherwise, you’ll end up with gaps you can’t fix.
- Paint Problems: Kit panels often come unpainted, and the finish will never match if you skip prepping or use different paint types. UV exposure can fade a cheap job fast. Take a piece to a paint shop for a scan and make sure you’re using the right paint code.
- Broken Mounting Tabs: Over-tighten those screws and—snap!—the tab breaks. Hand tighten hardware, and if a screw feels stubborn, back it out and check for obstructions. Never force it.
- Panel Rubbing or Rattling: Some parts just won’t snug up even with all the screws in. A roll of cushy double-sided tape can stop annoying sounds and protect your paint. Don’t skip foam padding if a section feels loose.
- Fastener Mix-Up: A lot of kits come with their own bag of mystery bolts. Lay them out and compare to instructions before you start; accidentally using a long screw can poke right through a panel or worse, your fender.
Here’s some actual numbers for you: According to a 2023 car mods survey, about 42% of DIY installers end up sanding or modifying one or more pieces for a proper fit, and nearly one in five have to source different hardware because the factory-supplied stuff either stripped out or got lost in the chaos.
| Issue | Percent of Installers Reporting |
|---|---|
| Panel fitment problems | 42% |
| Paint mismatch | 31% |
| Broken mounting points | 15% |
| Fastener issues | 19% |
Don’t be afraid to walk away and come back if you’re frustrated. Rushing a DIY car project is the fastest way to make expensive mistakes. Take the time to dry fit, check your tools, and keep hardware organized—you’ll dodge most of the classic problems before they start.
Should You DIY or Leave It to a Pro?
This is the question pretty much every car modder asks right after unboxing a new body kit. The truth is, not all kits (or cars) are created equal when it comes to installation. If you’re eyeing a simple lip or side skirt, and you’re handy with tools, DIY is totally doable. Most bolt-on kits just need you to follow basic instructions, maybe drill a few new holes, and then tighten things up. Paint-matched parts? That’s where things start to get tricky.
If the kit needs major modifications—like trimming, reshaping, or a heap of test-fitting—you’re looking at pro territory. Shops usually have specialty tools like air saws, heat guns, and spray booths. Even something basic like getting two bumper edges to line up flush can take way longer (and look way worse) if you’ve never done it before.
- DIY works for minor kits (lips, spoilers, simple side skirts).
- Complicated jobs (widebody kits, full bumper swaps) often need pro tools and paint matching.
- Hiring a pro means you’re paying for experience, better fit and finish, and a warranty if something goes sideways.
Here’s a quick comparison:
| Factor | DIY | Pro Install |
|---|---|---|
| Cost | Low to medium (mainly supplies) | High (labor, paint, tools) |
| Tools Needed | Basic (drill, sockets, clamps) | Advanced (air tools, paint booth, lifts) |
| Risk of Damage | Higher if inexperienced | Low (with reputable shop) |
| Time Commitment | Half day to a weekend | Usually 1-3 days at shop |
| Results | Can vary (good to "DIY look") | Consistent, pro finish |
Want a show-ready look or perfect car mods? Bring in the pros. But if you’re just looking to upgrade your daily driver for fun, doing it yourself could be a great learning experience—as long as you don’t mind a few rough edges or extra time. Faster isn’t always better when you want it to look sharp on the road.
Tips for a Smoother Install
If you want your body kit install to actually look good and hold up, you can't just wing it. Start by doing a dry fit before you drill or bolt anything. That means lining up every piece while your car is clean, just to spot gaps or places where you need to trim. This quick step alone can save you a ton of time and keep costly mistakes off your record.
Double check you’ve got all the right body kits fasteners, clips, and screws. Most kits are pretty barebones with hardware, so it's smart to have a set of plastic push clips, self-tapping screws, and double-sided tape handy. Quality tape makes a bigger difference than you'd think—go for strong brands like 3M, since cheap tape has a bad habit of peeling off just weeks later.
Paint before you mount. If you’re after a color match or just want things to look sharp, prep and paint each piece before putting it on. It’s ten times easier to mask and spray parts on a table than on the car and you’re less likely to get paint drips or overspray.
Having a buddy around helps—some panels, like bumpers or side skirts, need a second set of hands to hold in place while you drill or mark holes. It also stops you from scratching your new kit when it slips.
Here’s a quick checklist to keep things on track:
- Test fit each car mod piece first
- Have extra fasteners and strong double-sided tape
- Clean and dry all surfaces before mounting
- Mark and drill very carefully, starting with thin pilot holes
- Paint each part separately before final mounting
- Ask for help to avoid dings and scratches
Thinking about time? Here’s an idea of what you’re in for, based on people who do DIY installation tips:
| Type of Body Kit | Average Install Time (DIY, hours) |
|---|---|
| Bumper Replacement Only | 2–4 |
| Side Skirts Only | 1.5–3 |
| Full Kit (Bumper, Skirts, Spoiler) | 6–10 |
Lastly, keep the install space organized. Set parts out in the order you’ll mount them, and lay down old blankets or foam to protect painted pieces. It might sound basic, but digging for missing hardware or stepping on a fresh side skirt happens way too often. Keep things tidy, go slow, and your DIY car upgrade will turn out way cleaner than rushing through the job.