So, you're thinking about giving your car a makeover with a brand new body kit, huh? It’s a cool way to make your vehicle stand out and maybe even turn a few heads. But before you dive in headfirst and start unboxing those sleek pieces, there’s a bit of prep work involved.
First off, you need to know that installing a body kit isn’t like changing a tire. It takes time, patience, and a bit of elbow grease. You need to be ready to spend a few weekends in the garage, tinkering away. Why? Because fitting those pieces together perfectly is crucial not only for looks but also for performance and safety.
And don’t forget about the tools. Trust me, having the right tools makes all the difference. Imagine trying to screw something in with a butter knife—yeah, not fun and definitely not recommended. You’ll need basics like wrenches and screwdrivers, but maybe some specialty tools too, depending on your kit.
- What You Need to Know Before Starting
- Tools You'll Need for the Job
- Step-by-Step Installation Process
- Common Challenges and How to Overcome Them
- When to Call in the Professionals
- Maintaining Your New Body Kit
What You Need to Know Before Starting
Diving into a DIY car mod like installing a body kit might sound thrilling, but there are some key things to know before you grab that wrench. For starters, not all body kits fit every car, so you need to ensure that the kit you’re eyeing is compatible with your make and model.
Did you know that around 70% of body kit buyers initially select a kit that doesn't perfectly align with their car model? That's quite a lot of folks having to return and exchange their purchase. So, double-checking the fitment could save you both time and money.
Speaking of spending, expect to spend not just your time but also some cash. Even a basic kit can range from a few hundred to several thousand dollars, depending on the quality and material. Fiberglass kits, for instance, are cheaper but may crack easier, while polyurethane options are more durable.
Then, there's the matter of paperwork. Yep, some places require you to notify them about significant mods to your vehicle. “It’s always good practice to check with local authorities to ensure you comply with road safety regulations,” says Sam Walker, a veteran auto enthusiast.
"Your best bet is to consult your local regulations to avoid fines or even voiding your insurance."
And don’t underestimate the power of the internet. A good piece of advice is to hop on forums or YouTube to see if others have shared their experiences with the same kit on the same car model. Learning from their mistakes can help you dodge some bumps along the way.
Finally, consider what you want out of this project. If you’re after a specific look or performance boost, make sure your kit can deliver it. If it’s just about aesthetics, don’t get caught up in a complicated install that doesn’t really bring the look you want.
Tools You'll Need for the Job
Alright, let’s talk tools. Having the right gear is key to a smooth installation of your body kit. You don’t want to be halfway through the job and realize you’re missing something important. Let’s keep it simple and straightforward, shall we?
First up, you’ll need a good old set of wrenches and screwdrivers. They’re the bread and butter when it comes to car work. A socket set is also a must-have because those pesky bolts won’t loosen themselves. Trust me, investing in a quality set will save you a lot of headaches.
Next, get yourself a drill with a good range of drill bits. Why? Because not all body kits come with perfectly pre-drilled holes. Sometimes you’ve got to make your own adjustments, and a drill does the trick. Also, if your kit involves any fiberglass or metal work, a rotary tool can be a lifesaver for trimming and smoothing out edges.
- Plastic pry tools: Super handy for removing trim pieces without scratching up your car.
- Measuring tape: Precision is the name of the game. A tape measure ensures everything lines up just right.
- Jacks and jack stands: These keep your car up and safe while you work on the lower parts. Safety first, right?
- Sandpaper: For prepping surfaces and smoothing any rough edges after cutting.
- Paint supplies: If you plan to color match the kit, a spray gun and paint matching kit are awesome tools to have.
Lastly, having a partner to help can be invaluable. Some panels can be big and awkward, and an extra set of hands makes positioning them much easier. Plus, it’s always more fun to tackle car mods with a mate!
Step-by-Step Installation Process
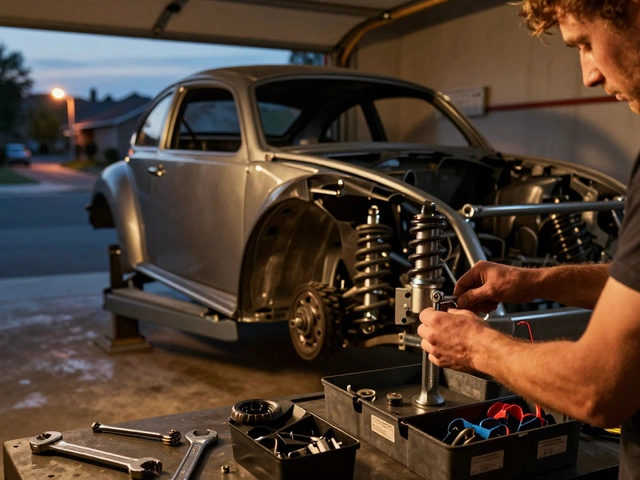
Ready to start the installation of that body kit? Awesome! Let's break it down step by step so you can tackle this project like a pro.
- Prep Your Workspace: First things first, make sure you have a clean and spacious workspace. You don't want to be tripping over boxes or searching for tools in the middle of the job. Clear out the garage or driveway and lay out everything you’ll need.
- Unbox and Inspect: Carefully unpack your car body kit and inspect each piece. Make sure there’s no damage from shipping, and double-check that you’ve got all the parts. Missing pieces can totally stall your project.
- Test Fit: This is where you test how each component fits onto your car before committing. Don’t skip this! Adjustments here can save you loads of trouble later. Remember, the fit should be snug but not forced.
- Drill and Attach: Time to get hands-on. If your kit needs drilling, mark your spots and drill holes carefully. Use the hardware provided to attach the parts. Keep it tight, but be cautious not to over-tighten and crack the pieces.
- Adjust and Align: Step back and check that everything lines up perfectly. An even look down the side of your car is a good indicator. For any misalignments, small tweaks and nudges should do the trick.
- Secure Everything: Once you’re satisfied, ensure all screws and bolts are securely tightened. Loose components can be a safety hazard, not to mention annoying with those rattles and squeaks.
"I can't overstate the importance of the test fit," says automotive expert James Tran. "Rushing this step is where most DIY projects go wrong."
Keep in mind, the key here is patience. Rushing can lead to mistakes, which means more time fixing things later. With these steps and a bit of elbow grease, you'll have your body kit sitting pretty on your car in no time.

Common Challenges and How to Overcome Them
Installing a body kit by yourself can be super rewarding, but it's not without its hiccups. You'll probably face a few bumps along the road, literally and figuratively. Let's talk about some of these common challenges and how to power through them.
First up, one of the most common issues is fitment problems. A lot of body kits look like they should just snap on, but more often than not, it involves some customization. You might need to sand, trim, or even drill new holes to get that perfect fit. Always double-check the alignment before you start screwing things in permanently. Using tape to hold things in place temporarily can save you from a lot of headaches.
Next, there's the issue of paint matching. This can be a real doozy if your new kit doesn't come pre-painted in your car's color or if your car has been exposed to the elements a lot, altering its original shade. Take a sample to your local auto paint shop; they can usually match it pretty closely. Spraying a perfectly even coat can be tough, so practice on a piece of scrap first.
Another hurdle is dealing with misaligned panels. This happens when one side fits perfectly but the other just doesn’t line up. Walk around your car regularly while installing and adjust as needed. A second pair of eyes can be a lifesaver here.
Electrical components, like installing lights that come with some kits, aren’t always straightforward. Make sure you disconnect the battery before messing with any wiring to avoid short circuits. If you're unsure, consult the kit’s manual or look up specific online guides for the electronic part of your DIY car mods.
Don’t forget the weather! Trying to install a car body kit when it’s raining or too cold can mess with the adhesives. Ideally, you want a dry, warm day for the best results.
- Fitment Issues: Sand, trim, or drill as required. Use tape for temporary fixes.
- Paint Matching: Get a professional paint match and practice spraying.
- Panel Alignment: Regularly check alignment from all sides.
- Electrical Components: Disconnect the battery first and follow precise guides.
- Weather Conditions: Plan for dry, warm days to ensure proper adhesive setting.
Tackling these challenges doesn't just save you from possible redo’s but also gives you more confidence in your ability to handle future car projects.
When to Call in the Professionals
You’re deep into your DIY car mod project, and suddenly, things aren’t fitting like you imagined. We've all been there. Sometimes it's just best to admit when a job is getting out of hand and bring in a pro.
First off, if your car body kit involves complex modifications like wide-body conversions, it’s best not to go it alone. These jobs can require precise cutting and custom fitting that might be outside the scope of at-home tools. And if you're sweating over the manual and scratching your head more often than not, it’s a sign.
Another biggie – paintwork. Unless you've got experience in auto painting, this might be a spot to let the professionals handle. Getting that clean, sleek finish often needs a controlled environment like a spray booth and specialist equipment.
Then there's the matter of time. DIY projects can take longer than expected. If your schedule's packed, it might be quicker overall to have a shop tackle it. This is doubly true if your car's your daily driver and you can’t be without wheels for weeks.
Don't forget safety. If the installation involves critical components like bumpers or air scoops that affect the aerodynamics and safety features, professional installation ensures everything’s roadworthy. You don’t want to hit the highway and suddenly hear a horrible rattle or, worse, something coming loose.
Here’s a quick list to help you decide:
- Advanced modifications needed
- Painting involved
- Lack of time
- Complexity causing stress or confusion
- Safety components are affected
Remember, getting a professional doesn’t mean you’ve failed as a DIYer. It's just a smart choice to ensure quality and safety. Plus, watching a pro handle your body kit installation could offer some insights for next time!
Maintaining Your New Body Kit
Congrats on getting your car body kit installed! But guess what? The job isn't quite over yet. To keep it looking as sharp as the day you installed it (and ensuring it stays put), you’ve got to give it some TLC.
First things first, it’s crucial to regularly wash your body kit. Dirt and grime can mess up that shiny look, and worse, they can damage the material if left unattended. Grab a soft cloth and a gentle car wash soap—something that won't strip the paint or finish—and give it a good clean. And don't forget to dry it properly to avoid water spots.
Next, inspect the fittings and bolts. You know how roads can be. A loose piece isn’t just embarrassing; it can be dangerous. Every month or so, check that everything is snugly fitted. If you hear any rattling while driving, it’s a telltale sign something’s come loose.
Let’s talk scratches. They happen; it's part of owning a car. To keep your DIY car mods looking pristine, always have some touch-up paint handy that matches your kit's color. Small scratches are quick to fix if you jump on them early.
Here's a neat tip: Apply a layer of wax to protect the paint job. Not only does this add an extra shine, but it also acts as a barrier against the elements. For extra UV protection, consider a specialized sealant designed for body kits.
If your body kit is made from fiberglass, you might run into some cracking over time. It’s not the end of the world! Just keep an eye out and address any minor cracks with a repair kit before they expand.
And lastly, remember this golden rule: park smart. Avoid spots where damage is likely—it might mean parking further away from the supermarket entrance or avoiding that tight spot altogether. The fewer bumps and dings, the better.
Your body kit doesn’t just make your car look awesome; it’s also a reflection of all the hard work you put in. Keep it in top shape, and you’ll enjoy the admiring glances for years to come!