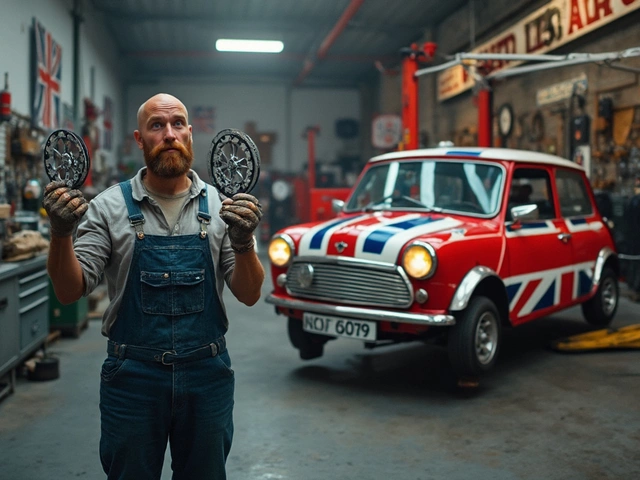
Thinking about adding a body kit to your car? It's a surefire way to give your ride a fresh look and potentially improve its performance. But where do you start? Well, the first thing you'll need to do is figure out which body kit suits your needs. Are you after a sleek, aerodynamic look, or something more aggressive? Do some research, check out different styles, and maybe even chat with fellow car enthusiasts.
Before you pop the hood or grab your wrench, you'll want to gather a few essential tools. A good socket set is a must, along with screwdrivers, a jack stand, and some microfiber cloths to keep things clean. Make sure you've got plenty of space to work in, too. Your garage or driveway will do, as long as you're not cramped for room.
- Choosing the Right Body Kit
- Essential Tools and Preparations
- Step-by-Step Installation
- Common Mistakes to Avoid
- Final Touches and Adjustments
Choosing the Right Body Kit
Picking the right car body kits isn’t just about looks—it’s also about what will boost your car’s performance. Start by considering your driving style and what you're hoping to achieve. Are you in it for better aerodynamics, or is this more about turning heads as you cruise the streets?
Match the Style with Purpose
For those keen on hitting the tracks, a lightweight, aerodynamic kit could improve handling and speed. On the flip side, if you’re all about style, maybe you’re eyeing some wide-body kits that give a more aggressive stance. Just remember to balance aesthetics with functionality, especially if this is your daily ride.
Material Matters
Materials make a big difference in a kit’s performance and durability. Fiberglass is popular for custom jobs; it’s lightweight and relatively cheap but can be less forgiving to damage. Urethane, while pricier, offers durability and flexibility, making it a favorite for those who drive their cars hard. Carbon fiber is top-dog in the lightweight category; it is the most expensive but gives that race-ready vibe.
Compatibility and Fitment
One of the most crucial steps in choosing a body kit is ensuring compatibility with your car model. Not all kits are universal, so double-check that what you like fits your vehicle snugly without extensive modification. Check reviews and forums for insights from others who have done the same mods on similar cars.
Consider Your Budget
A good body kit is an investment. Kits range widely in price, from a few hundred to several thousand dollars, depending on material and brand. Consider setting a budget before diving in to prevent any financial surprises.
| Material | Pros | Cons |
|---|---|---|
| Fiberglass | Lightweight, affordable | Can be brittle, easily damaged |
| Urethane | Durable, flexible | More expensive, heavier |
| Carbon Fiber | Very lightweight, strong | High cost |
Before making that final decision, study the market, reflect on your goals, and choose a kit that will not only fit your car but also fit your personality and driving needs.
Essential Tools and Preparations
Getting ready to fit a car body kit isn't just about picking the parts. You'll need the right tools and a solid game plan. Imagine trying to install a body kit without a wrench! It's like trying to cook without pots and pans—just not gonna happen.
Must-Have Tools
- Socket Set: A good quality socket set is your best friend. You've got bolts of various sizes here, and a socket set helps tackle them all.
- Screwdrivers: Both flathead and Phillips screwdrivers are necessary for the smaller screws and clips.
- Jack and Jack Stands: You'll want to get your car up safely to remove wheels or fit side skirts.
- Microfiber Cloths: Useful for cleaning surfaces before attaching the kit, ensuring a good bond.
- Drill and Drill Bits: Sometimes, a body kit requires making new holes. Make sure the drill bits are suitable for metal and plastic.
Preparation Steps
Before touching that first bolt, preparation is key. Start by reading the instructions that come with your kit. They often offer manufacturer-specific tips that can save you a headache. A clean car is a happy car, so wash and dry the area where the body kit will go. Any dirt or grime can interfere with adhesive bonds.
"Preparation is paramount to a hassle-free installation," says Mike Turner, editor of Modded Cars Magazine.
Finally, lay out all the parts and hardware included in your kit. Compare it with the manual to ensure nothing's missing. Missing a bracket or a bolt can put the brakes on your plans quite literally.
Space and Safety
Make sure you've got enough room to maneuver. A spacious garage or driveway is ideal. Safety first—as always. Wear safety glasses, especially if you're drilling or cutting.
If you're new to this, don't be afraid to ask for a buddy's help. Two heads (and hands) are better than one, especially when adjusting or lifting heavier components.

Step-by-Step Installation
Alright, now down to the good stuff—installing your car's new body kit! It's not just about making your car look cool; it's about getting that kit on there snug and secure. Here's how to tackle this project step-by-step.
Step 1: Prepping Your Car
First up, give your car a good clean. Dirt and grime can mess with the adhesive and bolts, so don't skip this step. Once it's sparkling, remove any existing body parts from your car that'll be replaced by the new kit.
"Preparation is the key to success," says auto expert Jake Harlan. "A spotless surface ensures a tight fit and long-lasting hold."
Step 2: Dry Fit the Body Kit
Dry fitting means temporarily holding or lightly attaching the parts to ensure everything lines up perfectly. This isn't the time for adhesives or bolts just yet. It will give you a clear idea of how the kit fits and where you'll need to make adjustments.
Step 3: Mounting the Kit
Now comes the real deal. Start attaching the kit piece by piece. Whether it's using screws, bolts, or adhesive, double-check each connection is secure. You want everything to be as aerodynamic as possible.
- Front Bumper: Line it up with your car's natural contours and secure it in place.
- Side Skirts: These usually require you to jack up the car for easier access.
- Rear Bumper: This can be tricky, so take your time to ensure a perfect fit.
- Spoilers and Other Accessories: These add-ons should be installed last.
Step 4: Final Adjustments
With everything bolted down, check for any gaps or misalignments. A small tweak here and there can make a huge difference in aesthetics and performance. Use a leveler and make sure your car is on an even surface for this.
Step 5: Buff and Polish
Once the kit is securely in place, give your car a final polish. This not only enhances the look but also protects your investment.
When you follow these steps, you'll not only have a better-looking ride but also a new appreciation for car modification. Remember, it's not just about the destination; it's about the journey of making your car truly yours.
Common Mistakes to Avoid
Installing a body kit might seem straightforward, but there are a few common pitfalls you'll want to dodge to make sure your car looks its best. Let's break down what not to do!
Skipping the Test Fit
Before you break out the tools, always do a test fit of your car body kits components. This helps you see how everything lines up and if any adjustments are needed before you start drilling or bolting parts down.
Ignoring Instructions
It might sound obvious, but thoroughly read through the installation guidelines provided. Different brands and models can have unique quirks. Ignoring these could lead to fitment issues or damage to your kit or car.
Rushing the Process
If you rush through the installation of your body kit, you're likely to make mistakes. Set aside plenty of time to do it right. You want a snug, precise fit, not a hurried job that leaves gaps.
Failing to Secure Properly
Use all the screws, clips, or adhesives as instructed. Missing even one can cause parts to wiggle or, worst-case scenario, fall off. Nobody wants to lose a bumper on the highway!
Ignoring Alignment
Cars are precisely engineered with aerodynamics in mind. Poorly aligned body kits can affect performance, especially at higher speeds. Make sure elements are aligned correctly and sit flush.
Over-Tightening Screws
It might be tempting to crank screws down as hard as you can, but over-tightening can crack or deform parts, especially if the kit is made from fiberglass.
| Common Mistakes | Potential Issues |
|---|---|
| Skipping Test Fit | Poor Alignment |
| Ignoring Instructions | Incorrect Installation |
| Over-Tightening Screws | Cracks |
A little patience and attention goes a long way towards making your installation as smooth as possible. Remember, it's not just about looks — proper installation impacts safety and performance too!

Final Touches and Adjustments
So, the main work is done and the body kit is finally on your car. But hold up, you're not quite finished just yet. Those final tweaks and adjustments are crucial for making sure everything looks seamless and fits like a glove. This is where you fine-tune and ensure everything's just right.
Check for Alignment
Before hitting the road, it's important to make sure all the new parts align properly. Misalignment can lead to undue stress on the components and might even affect the car's performance. Stand back, look from different angles, and if something seems off, adjust it accordingly. This step is all about patience and a keen eye.
Secure All Components
Go over every bolt and screw again. Even if you think you've tightened them properly during installation, a second check can't hurt. Use your socket set to ensure everything is snug but not overly tightened, which could damage the body kit.
Paint Touch-Ups
If your kit came unpainted, or if you see any chips or scratches, now's the time for paint touch-ups. Most auto parts stores can mix paint to precisely match your car's color. A little prep work here ensures your car modification blends seamlessly with the existing body.
Testing the Set-Up
Before you consider the job done, take your car for a test drive. Pay attention to any unusual noises or vibrations. A short drive will help you determine if further adjustments are needed to ensure everything is sound and secure.
Admire Your Work
After you've ensured everything's fitted perfectly and securely, take a step back, admire your work, and give yourself a well-deserved pat on the back. Fitting a body kit is no small feat, and now your car not only looks fab but feels like you're driving a brand new ride. With these steps complete, you're ready to show off your upgraded car to the world.
| Adjustment Step | Tools Required | Time Estimate |
|---|---|---|
| Alignment Check | Visual Inspection | 15 minutes |
| Component Securing | Socket Set | 30 minutes |
| Paint Touch-Ups | Touch-Up Paint Kit | 45 minutes |
| Test Drive | N/A | 20 minutes |

