Ready to change up your car’s look from the inside out? You’re probably asking yourself, what do I actually use to paint all those tough spots—plastic, vinyl, maybe even leather? Turns out, picking the right product is a make-or-break move if you want your interior to look sharp and last longer than one season.
Most folks don’t realize that random spray paint from the hardware store just won’t cut it for car interiors. The surfaces in your car are built to take a beating: heat, UV rays, greasy hands, you name it. That means you need paints and dyes specifically made for car interiors—things like vinyl dye or specialty interior spray paint. These bond right into the material instead of just sitting on top like regular paint. Result? No more cracking, peeling, or sticky mess.
And let’s bust a myth: you don’t need a professional shop for a killer result. The key is knowing what’s inside your car—hard plastics? Soft-touch panels? Real or fake leather? Each needs a slightly different approach. Get this wrong, and even the fanciest paint won’t hold up, especially with how much you touch everything inside your car.
- Understanding Car Interior Materials
- Types of Paints and Dyes for Interiors
- How to Prep Surfaces Like a Pro
- Pro Tips for Lasting Results
Understanding Car Interior Materials
If you want awesome results with car interior paint, you’ve got to know what you’re working with inside your ride. The average car interior isn’t just one type of material—it’s usually a mix of plastics, vinyl, cloth, and sometimes real or synthetic leather. Each one soaks up paint and dye in its own way, so what sticks to one part might come right off another if you use the wrong stuff.
Most dashboards and door panels these days are made from hardened plastics or vinyl. That’s because they’re tougher and can handle the sun beating down through your windshield. You’ll also find soft-touch plastics on higher-end cars, which are nice but can be picky about what products will actually bond with them. Older cars sometimes use real leather on seats or trim, while newer models tend to stick with synthetic leather, known as "pleather" or vinyl—cheaper for factories and easier to maintain.
Want a quick breakdown? Check out this cheat sheet on what’s usually inside your car:
| Interior Part | Common Material |
|---|---|
| Dashboard | ABS Plastic, Vinyl |
| Door Panels | Hard Plastic, Vinyl, Cloth |
| Seats | Leather, Synthetic Leather, Cloth |
| Trim | Plastic, Metal (sometimes), Leather |
Getting your interior car styling project right starts with testing a hidden spot before you go all in. Some plastics have slick coatings left over from the factory that make regular paints bead up and not stick, so always check for any weird reactions. And if you’re still not sure what your panels or seats are made of, look up your make and model online—there’s usually someone who’s already figured it out and posted a guide or video.
Bottom line: knowing your car’s interior materials makes it way easier to pick the right interior car styling products, get smooth coverage, and avoid throwing money at something that just won’t last.
Types of Paints and Dyes for Interiors
Walk into any auto parts store and you’ll see a handful of options for painting or freshening up your car interior. But don’t grab the first can you see. Here’s what actually works when it comes to car interior paint and dyes.
Vinyl Dye: If your ride has lots of vinyl or plastic (think door panels, dashboards, and center consoles), vinyl dye is made for you. It’s not just paint. It soaks right into the surface, which means no thick layers to crack or peel later. People love it for its even, factory-style look. You’ll see brands like SEM Color Coat and Dupli-Color Vinyl & Fabric around, and they come in an almost wild number of colors.
Specialty Interior Spray Paint: Regular spray paint? Forget about it. Spray paints made for interior car styling have built-in flexibility and strong UV resistance. These work best for hard plastics (dashboard, pillars, and trim pieces). Krylon Fusion All-In-One and Rust-Oleum Specialty Vinyl are big names here. They bond tight, resist fading, and hold up under daily abuse.
Fabric Paints and Dyes: Want new seat colors or to touch up faded carpets? Look for fabric paint or spray-on dye labeled for automotive use. Dupli-Color has a Fabric & Vinyl Dye spray, while SEM sells a dedicated Carpet & Upholstery spray. With the right prep, you can honestly keep that fresh look for years—just follow the directions on drying times.
Leather Dyes: True leather can be revived (and totally transformed) with a quality leather dye. These are liquid, get worked in with a sponge or applicator, and most importantly, flex with the leather. Fiebing's Leather Dye and Colourlock are two solid choices if your seats or steering wheel have lost their vibe.
Let’s compare some of the top options side-by-side:
| Type | Best For | Average Durability | Ease of Use |
|---|---|---|---|
| Vinyl Dye | Dashboards, Door Panels | 3-5 years | Easy (spray application) |
| Specialty Spray Paint | Plastics, Trim | 2-4 years | Moderate (multiple coats) |
| Fabric Paint/Dye | Seats, Carpet | 2-3 years | Moderate |
| Leather Dye | Leather Seats, Wheel | 5+ years | Requires detailed prep |
The biggest takeaway? Always match the paint or dye to the material you’re working with. Using a vinyl dye on hard plastic, for example, wins every time over generic paint. And if you’re new to this, test the color on a hidden spot first. You’ll thank yourself for it.

How to Prep Surfaces Like a Pro
Before you even think about busting out the car interior paint or vinyl dye, surface prep is where it all starts. Skipping this step is the quickest way to wind up with bubbles, peeling, or that ugly patchy look. Here’s the secret: the prep matters as much as the paint you pick.
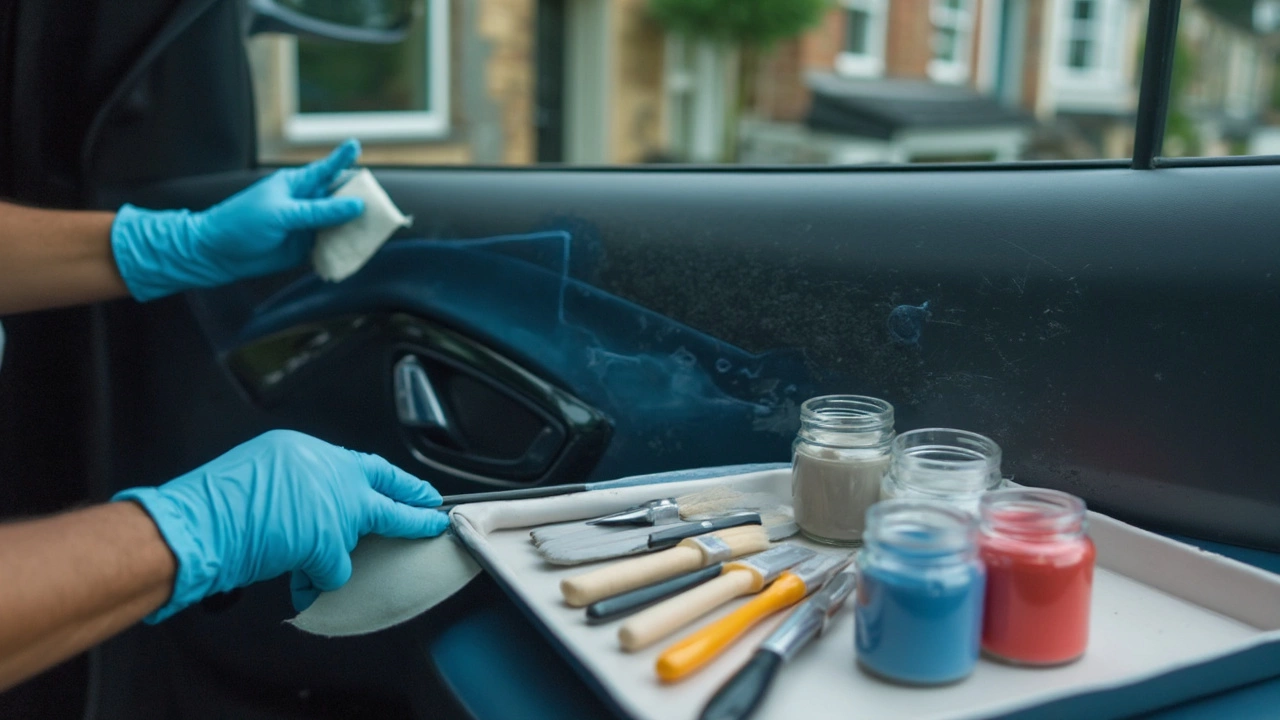
The first step—get everything clean. Wipe down every inch you plan to paint with a grease-cutting cleaner, not just soap and water. Most pros swear by rubbing alcohol or a dedicated automotive interior cleaner. Dirt or oils left behind will mess with the paint’s ability to stick.
"The single best thing you can do for paint longevity is spend twice as long prepping as you do painting." — Adam Mercer, veteran detailer at Detail Garage
Once your dashboard, door panels, or whatever you’re working on are spotless, you’ll want to get rid of that slick factory finish. For hard plastic or vinyl, lightly scuff the surface with a gray Scotch-Brite pad or some 400-grit sandpaper. Don’t go overboard—just enough so it feels a bit less shiny and more like a matte surface.
If you’re going all in on an interior project, masking is your next non-negotiable step. Grab some painter’s tape and plastic sheeting and cover anything you don’t want painted—think vents, gauge clusters, audio knobs, and glass. You won’t believe how much spray travels in a closed car.
- Clean thoroughly with an alcohol-based cleaner or degreaser
- Scuff surfaces for better paint grip
- Mask off all areas you don't want painted
- Let surfaces fully dry before painting
If you want numbers, check this out: most failures with interior car styling projects trace back to poor prep—over 70% reported on DIY forums is blamed on not cleaning or sanding enough. So, take your time here. Nail the prep, and you’ll be halfway to a pro-looking finish that sticks and lasts.
Pro Tips for Lasting Results
Getting your car interior paint job right isn't rocket science, but details make all the difference. It’s all about prep, patience, and picking the right stuff for the job. If you’re after a finish that holds up to the daily grind—not just on day one, but months down the road—check out these battle-tested tips.
- Clean, clean, clean: Even tiny bits of grime or old conditioners can ruin adhesion. Use a real degreaser, not just soapy water, and don’t rush this step.
- Scuff up smooth surfaces: Plastic and vinyl don’t like to hold paint. Lightly sand with a fine-grit pad (think 400+) to give the interior car styling products something to bite into.
- Prime if needed: Some plastics absolutely demand primer—especially if you’re painting light over dark. Look for "adhesion promoter" sprays made for car interiors.
- Apply thin coats: Heavy coats make for drips and take longer to dry. Most interior car styling sprays work best in several light passes, with 10-15 minutes between each.
- Patience during drying: Even if it feels dry to the touch, interior paints and dyes keep hardening for a full 24-48 hours. Plan for extra time before you put panels back together and let the paint cure properly under moderate temps.
Here’s a handy table to compare drying times and durability for popular car interior paint options:
| Product Type | Touch Dry | Full Cure | Avg. Durability |
|---|---|---|---|
| Vinyl Spray Dye | 10 mins | 24 hours | Up to 3 years |
| Plastic Trim Paint | 15 mins | 48 hours | 2-5 years |
| Flexible Fabric Paint | 20 mins | 36 hours | 1-2 years |
Want a pro’s take? Here’s what Aaron Robison, a detailer with over two decades of experience, says:
“If you skimp on prep, no paint—no matter how good—will last. Sand, clean, use an adhesion promoter, and always give it the right dry time. That’s the game-changer for interiors.”
One last tip: Always keep leftover paint for minor touch-ups down the line. No matter how tough the product claims to be, daily use will always win a few battles, and spot fixes keep your interior car styling sharp without redoing the whole job.


