Ever glanced at your car's interior and thought those seats could use a facelift? You're not alone! Reupholstering your car seats is like giving your ride a stylish upgrade without the hefty price tag of buying new. But where do you start?
First off, think about why you're considering it. Maybe your seats are worn out, or perhaps you just want a change. Whatever the reason, revamping your car’s interior can boost its value and comfort. It’s like breathing new life into an old favorite.
Choosing the right material is crucial. You’ll have to decide between leather, fabric, or even exciting materials like Alcantara. Each comes with its perks and quirks, so pick what fits your lifestyle. Leather, for instance, looks luxe and is easy to clean, but can be on the pricier side.
Then there's the big question: do you DIY or hire a pro? If you're handy and up for a challenge, DIY could be the way to go. It'll save you some bucks, and there's nothing quite like the satisfaction of a job well done. But, if you're not too confident in your skills, calling in the experts might be worth every penny.
- Why Reupholster Your Car Seats?
- Choosing the Right Material
- DIY vs. Hiring a Professional
- Tools and Materials You'll Need
- Step-by-Step Reupholstering Guide
- Common Mistakes and How to Avoid Them
Why Reupholster Your Car Seats?
Upgrading your car seats isn't just about aesthetics; it can make a huge difference in comfort and value. If your current seats are looking tired or feel lumpy, then it's probably time to consider a revamp. There are definitely some solid reasons to rethink your car's interior.
First, think about the comfort factor. Older seats can lose their cushioning, turning long drives into uncomfortable experiences. By reupholstering, you can add extra padding or choose a plusher material. This simple change can transform your daily commute.
Next, consider the car's value. Keeping the interior well-maintained can seriously boost resale value. A fresh set of car seat upholstery can make your vehicle look newer and more appealing to potential buyers.
Aesthetics matter, too. Whether you're into sleek black leather or want a splash of color, custom car seats let you express your style. It's like giving your ride a personality makeover!
Let's not forget durability. If you're planning to keep your car for a while, investing in quality DIY reupholstering materials means your seats can withstand the wear and tear of daily life, especially if you’re juggling kids, pets, or just love the great outdoors.
Reupholstering isn't just for looks or comfort. It's a smart investment in your car's longevity and, ultimately, your driving pleasure. Choosing to update your seats can turn an everyday vehicle into a reflection of your personal taste and lifestyle. So, why not take the plunge?
Choosing the Right Material
Picking the perfect material for your car seat upholstery is like choosing what to wear to a special event – it’s got to look good, feel comfortable, and suit the occasion. Whether it’s leather, fabric, or something more exotic, the choice can significantly change your driving experience.
First up, leather. It's the go-to for many who want a luxurious feel. It's durable, easy to clean, and gives that classic car interior vibe. However, it can be pricier and needs some care to avoid cracks and wear.
If you’re leaning more towards comfort and budget-friendliness, fabric might be your best bet. There are tons of color and pattern choices, making it easier to customize your car seat upholstery to your style. Plus, it’s generally more breathable, so no more sticking to seats on hot summer days!
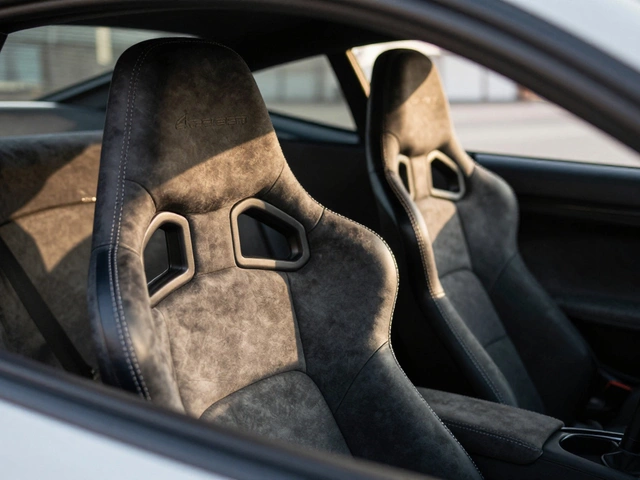
For those who want something unique, materials like Alcantara offer a premium feel and are becoming super popular in custom car seats. It’s resistant to fading and water, though it requires careful maintenance due to its plush surface.
Here's a quick material comparison chart:
| Material | Cost | Durability | Maintenance |
|---|---|---|---|
| Leather | High | Excellent | Moderate |
| Fabric | Medium | Good | Easy |
| Alcantara | High | Very Good | Moderate |
Whatever you choose, make sure it reflects not just your style but your lifestyle. Consider factors like if you have pets who might scratch the seats or kids with sticky fingers! Balancing aesthetics with practicality is key to enjoying your new car seat upholstery.
DIY vs. Hiring a Professional
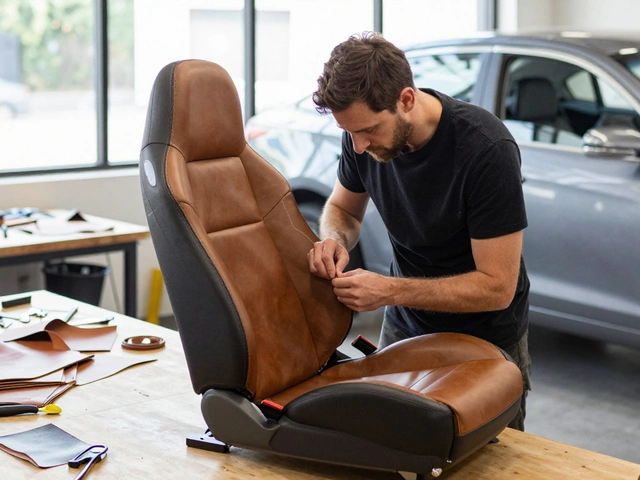
Reupholstering your car seats can be a rewarding experience, but figuring out whether to tackle it yourself or call in a pro can be tricky. Both options have their pros and cons, so it's all about what works best for you.
DIY reupholstering might sound challenging, but for the adventurous, it's a fun project with a personal touch. You get to pick everything, down to the stitching, and the satisfaction of seeing those sleek new seats all thanks to your handiwork? Priceless. Plus, it's cost-effective. A typical DIY job might save up to 50% of what you'd pay a pro. But remember, it requires patience, skill, and time.
On the other hand, hiring a professional ensures you don't have to sweat the small details. Pros bring their experience, specialized tools, and precise techniques to the table, guaranteeing a clean, durable finish. They know how to handle different fabrics and complex seat designs. While this option might be more expensive, usually ranging from $500 to $2,000, the peace of mind and quality you get can be worth the extra cash.
Here's a quick breakdown of what you might consider:
- Budget: If budget's tight, going DIY can help you save. But don’t skimp on quality materials.
- Time: Pros can have the job done in a few days. DIY might stretch over weekends.
- Skill Level: DIY requires some upholstery skills and confidence in using tools like staple guns and sewing machines.
- Final Look: For a polished, showroom-ready finish, a professional typically has the upper hand.
At the end of the day, it’s all about your priorities. It’s not just about aesthetics but also about how much time and effort you’re willing to invest. Whether you go DIY or professional, upgrading your car seat upholstery will definitely give your car that much-needed makeover.
Tools and Materials You'll Need
Alright, ready to roll up your sleeves and get into the nitty-gritty of reupholstering those car seats? First thing's first: you gotta have the right tools and materials to make it happen smoothly. Don't worry, it's not as intimidating as it sounds.
Here's a list of some basic tools you'll want to gather:
- Staple Gun: This gem helps secure the upholstery fabric to the base of the seats. Go for a heavy-duty one for the best results.
- Screwdriver Set: You'll need this to remove seats from the car and any existing covers or bolts.
- Pliers: Handy for pulling out old staples or clips without damaging your car's frame.
- Upholstery Foam: If your seat foam is in bad shape, replace it with fresh foam for more comfort. Aim for high-density foam for durability.
- Fabric Scissors: A good pair of sharp scissors will make cutting the new fabric a breeze.
- Measuring Tape: Get precise measurements of your seat covers so your new ones fit like a glove.
Now, let's talk about the materials you're gonna need:
- Upholstery Fabric: Choose a material you love from options like leather, vinyl, or cloth. Make sure it's durable and stain-resistant, since car seats see a lot of wear.
- Adhesive Spray: This can help adhere foam to the seat frame and keep everything in place.
- Batting: A layer of batting between the foam and fabric adds a cushy feel, not to mention it’s a pro move if you're going for that lush look.
- Zipper or Velcro: Depending on your design, these closures keep the covers snug and removable.
If you're eyeing leather or a similarly premium material, it helps to know that genuine leather typically lasts between 10 and 15 years with proper care, making it a solid long-term investment.
See? All this talk of car seat upholstery isn't too overwhelming once you break it down into a checklist. Get these tools and materials ready, and you’ll be all set to start crafting your dream custom car seats.
Step-by-Step Reupholstering Guide
So you've decided to reupholster your car seats. Sweet! It might seem like a daunting task at first, but with a little patience and elbow grease, you can pull it off. Here’s a straightforward guide to get you rolling.
- Remove the Seats: The first step is getting those seats out of your car. Grab some basic tools like a wrench or screwdriver. Make sure you remember how to put them back—I know, sounds obvious, but you’d be surprised!
- Strip the Old Upholstery: Carefully remove the existing fabric. You’ll need a staple remover or a blade for cutting through seams. Be gentle so you don’t damage the seat padding underneath.
- Create a Pattern: Use the old fabric as a template. Lay it flat on your new material (leather, fabric, whatever you chose) and trace the shape. This ensures you have the right sizes to work with.
- Cut and Sew: Once your patterns are ready, cut them out and start sewing. A heavy-duty sewing machine is your best friend here. Stitch the pieces together just like the originals.
- Fit the New Upholstery: Stretch and fit your new creation over the seat, keeping it snug. You’ll feel like a car seat hero once it starts coming together.
- Secure Everything: Use strong staples or adhesive to keep the fabric in place. Make sure there’s no slack, especially on those inevitable corners and edges.
- Reinstall the Seats: Pop your newly reupholstered seats back into place. Tighten those bolts and make sure everything’s safe and sound.
Before you start, consider setting aside a weekend to tackle this project, especially if it’s your first time. And remember, practice makes perfect. Don’t stress if it’s not flawless—your ride is already looking better!
Common Mistakes and How to Avoid Them
Tackling car seat upholstery is pretty exciting, but it's easy to trip up along the way if you're not careful. Here are some common blunders people make and how you can steer clear of them.
First off, folks often underestimate the importance of proper material measurement. You don’t want to end up with awkwardly short fabric pieces that don't cover the seats properly. Always measure twice and cut once to reduce waste and ensure a snug fit.
Another pitfall is choosing the wrong material. Some might go for the cheapest option when reupholstering, but it’s vital to consider durability. A poor-quality fabric can wear out faster, undoing all your hard work. Opt for materials specifically designed for automotive use.
The temptation to rush is real, but patience is key. Skipping steps or not allowing adhesive to set properly can mess up the whole look. Follow each step thoroughly, and give yourself plenty of time to complete the project.
Improper tool usage can also be a headache. Using makeshift tools instead of the recommended ones might damage the fabric or even the car’s structure. Invest in the right tools from the start to save yourself from future woes.
"It's the attention to detail that makes the difference between average and stunning," says car restoration expert Mike Philips. "Make sure every stitch and seam is up to par."
Finally, don't neglect safety. Improperly secured seats can be dangerous. Double-check everything is tight and secure before hitting the road.
- Material measurement: Measure twice, cut once.
- Material choice: Go for durability rather than just low cost.
- Rushing: Take your time, especially with adhesives.
- Tool usage: Use specialized tools to avoid damaging your car.
- Safety first: Always ensure everything is securely fastened.
Avoid these mistakes, and you'll be cruising in style with your custom car seats in no time!