Body Kit Installation Made Easy: A Practical Guide for Nottingham Car Owners
Thinking about giving your ride a sharper look? A body kit can transform a bland hatchback into a head‑turner, but the big question is – can you fit it yourself? The short answer is yes, as long as you follow a clear plan, have the right tools, and respect local regulations. Below we break down the whole process, from prep to final polish, so you can avoid costly mistakes and enjoy a professional finish.
What You Need Before You Start
First, gather the essentials. A typical kit includes front bumper, side skirts, rear bumper, and sometimes a spoiler or diffuser. Check the parts list against your car’s make and model – a mismatch can lead to gaps or extra drilling.
Tools you’ll need:
- Metric socket set and wrenches
- Electric drill with drill bits (for mounting holes)
- Trim removal tools or flat‑head screwdrivers
- Masking tape and a marker
- Rubber mallet or soft‑face hammer
- Clean rags and mild degreaser
A helper isn’t required, but an extra pair of hands makes aligning large pieces like the rear bumper much smoother.
Step‑by‑Step Installation Process
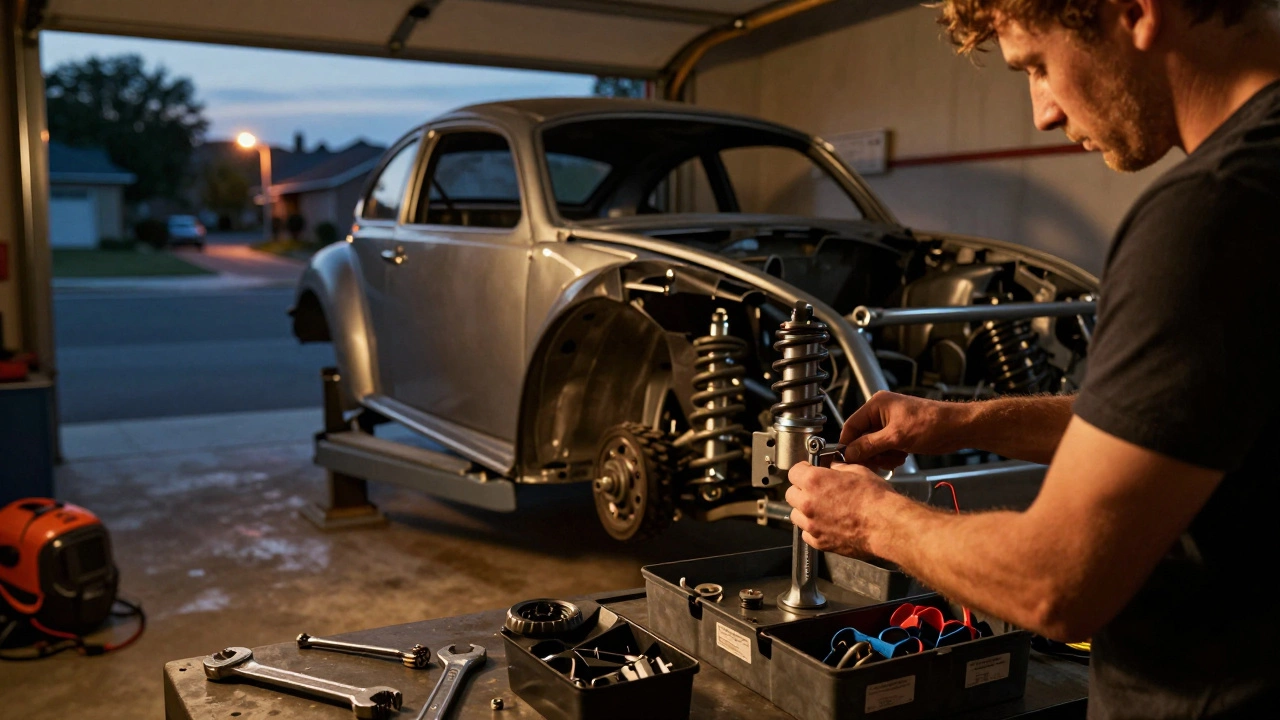
1. Prep the Car
Wash the whole vehicle and dry it thoroughly. Any dirt or wax can prevent adhesives from bonding properly. Remove the stock bumpers and any trim that will be replaced. Keep bolts and clips in a labeled bag so you know where they belong later.
2. Test Fit All Pieces
Before you drill, place each kit component against the body. Use masking tape to mark where the factory mounting holes line up. This step shows you if any extra drilling is needed and helps you spot misalignments early.
3. Drill New Holes (If Needed)
If the kit requires new mounting points, double‑check your marks, then drill slowly to avoid cracking the paint. Start with a small pilot hole, then expand to the required size. Clean the holes with a brush to remove metal shavings.
4. Attach Brackets and Mounts
Most kits come with brackets that bolt onto existing points. Secure them firmly but don’t overtighten – you want a snug fit without stressing the metal. Use the rubber mallet to tap plastic clips into place without breaking them.
5. Fit the Body Kit Pieces
Line up the front bumper, side skirts, and rear bumper with the brackets. Push gently until they snap or click into place. If you notice gaps, adjust the brackets or use a small amount of automotive adhesive to seal the seam.
6. Seal and Finish
Apply a bead of high‑temperature silicone sealant along the edges where the kit meets the car’s body. This prevents water ingress and reduces road noise. Once the sealant cures (usually 24 hours), give everything a final wipe‑down with a clean rag.
7. Final Check
Walk around the car, looking for uneven gaps, loose bolts, or misaligned panels. Tighten any loose fasteners and make sure the kit sits flush with the body lines. Test drive at low speed to feel for vibration or rattles – they’re often signs of a loose mount.
That’s it! With patience and the right tools, you’ve saved a professional shop’s labour charge and ended up with a body kit that looks as if it was factory‑fitted.
Legal and Practical Tips for Nottingham Drivers
In Nottingham, any modification that changes a car’s dimensions or visibility must pass the local MOT test. After installing a kit, schedule a MOT within a month to confirm everything meets safety standards. Also, check council rules about front‑end modifications – some areas restrict large front splitters or aggressive spoilers.
Keep the original parts stored safely. If you ever decide to sell the car or the kit doesn’t work out, you can re‑fit the stock pieces and avoid de‑valuation.
Finally, protect your investment with a quality wrap or paint sealant. A good clear coat will keep the kit looking fresh and resist chips from road debris.
Ready to give your car a new personality? Follow these steps, stay safe, and enjoy the fresh look that a well‑installed body kit brings to every drive through Nottingham’s streets.
Building a kit car takes anywhere from 3 months to over 2 years, depending on your experience, the kit type, and how much time you can dedicate. Learn what really affects the timeline and how to avoid common delays.
Thinking about installing a body kit on your car? It’s a task you might be tempted to tackle yourself to save some bucks and get hands-on with your ride. However, it’s not as simple as a Sunday drive. This guide explores the nuts and bolts of DIY body kit installation, with practical advice and some neat tips to help you decide if you want to roll up your sleeves or call in the pros.
Fitting a body kit to your car can enhance both its aesthetics and performance. This article offers practical advice on selecting the right kit, prepping your car, and ensuring a smooth installation. Whether you're upgrading for looks or speed, equipping yourself with the right tools and know-how is key. From bolting on new parts to ensuring snug fits, customizing your car has never been more accessible.