Vinyl Decals – Quick Guide to Styling Your Car
Ever looked at a car on the street and thought, “Wow, that graphics set is awesome”? Most of the time that shine comes from a vinyl decal. Decals are cheap, easy to change, and can turn a bland ride into a statement. In this guide you’ll get the basics on picking the right design, preparing the surface, and sticking the decal on without bubbles.
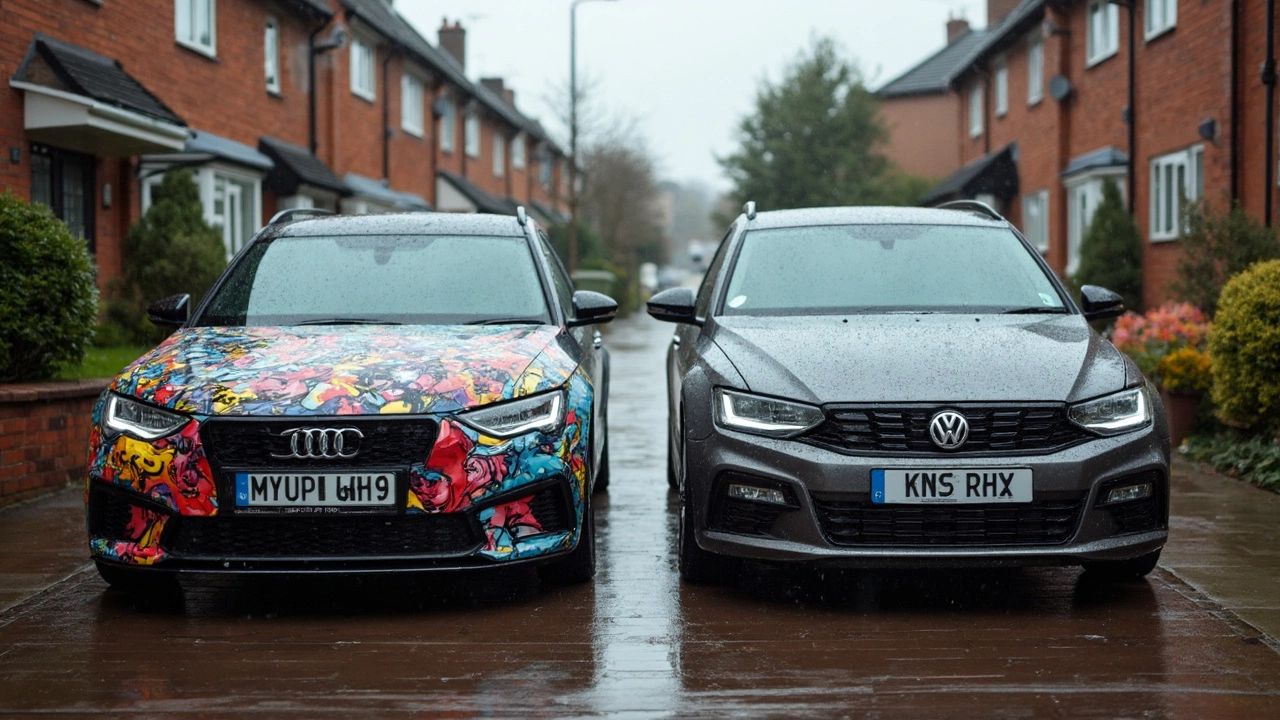
Choosing the Right Vinyl Decal
First, decide what you want the decal to do. Do you need a simple logo for your business, a race‑inspired stripe, or a custom graphic that shows off your hobby? Look for a dealer that offers custom printing so you can upload your own art. If you’re not a designer, many sites have ready‑made templates you can tweak with your colors.
Material matters, too. Most decals use cast vinyl, which stretches a bit and conforms to curves better than cut‑vinyl. Choose a finish that matches your style – glossy for a shiny look, matte for a low‑key vibe, or even matte‑glitter for something unique. Check the thickness; 3‑mil is typical for everyday use, while 5‑mil works better on rough surfaces.
Don’t forget durability. If you live in a rainy area or plan to wash the car often, get a decal with a UV‑protective laminate. This layer keeps colours from fading and makes cleaning easier. A good quality laminate also resists peeling when you hit the car wash.
How to Install Your Decal Like a Pro
Installation looks harder than it is. Gather a few tools first: a spray bottle with soapy water, a squeegee or credit card, a cutting blade, and masking tape. Clean the area with isopropyl alcohol – no wax or grease can cause bubbles later.
Next, position the decal without removing the backing. Tape the corners to the car and step back to check alignment. Once you’re happy, spray the adhesive side with soapy water. This lets you slide the decal into place and reposition if needed.
Starting at one edge, gently peel the backing while smoothing the sticker with your squeegee. Work slowly and keep the surface wet; the water acts as a slip agent and helps push out air. If a bubble forms, lift the nearest corner and push the bubble toward the edge. After the whole decal is on, spray a light mist of water over it and run the squeegee again to remove any remaining moisture.
The final step is drying. Let the decal sit for at least an hour before washing the car. For the first few days avoid high‑pressure washers – a gentle hose is fine. If you notice any lifting edges after a week, re‑apply a little heat with a hair dryer and press them down.
With these steps you can give your car a fresh look in under an hour. And if you ever want a new style, vinyl decals peel off cleanly without damaging the paint – perfect for renters or anyone who likes to change often.
Looking for more car‑related tips? Check out our articles on custom window tints, performance air filters, and roof rack installations. All of them can complement your new decal and keep your ride looking sharp.
Trying to pick between decal and vinyl for your car isn't as simple as it sounds. This article breaks down the differences, using real-world tips so you don't waste your money. From looks to lasting power, every angle is covered, helping you pick what's right for your ride. You'll get clear answers, smart tips, and no fluff. Everything you need to decide is right here.