K&N Filter Guide – What You Need to Know
If you’ve ever wondered why car enthusiasts keep talking about K&N filters, you’re not alone. These reusable air filters promise more horsepower, better airflow, and a longer life than cheap paper ones. In this guide we’ll break down the basics, show you how to fit one yourself, and share a few maintenance tricks to keep the performance gains coming.
Why Choose a K&N Filter?
K&N filters are made from a high‑flow cotton gauze that’s coated in oil. The oil traps dust while letting air rush through, so the engine gets a richer breath. Most owners notice a small bump in power and a noticeable drop in throttle lag. Because the filter can be cleaned and re‑oiled, you’ll replace it far less often than a disposable paper filter – that’s a real money saver over time.
Another perk is the sound. Many drivers love the deeper intake note that comes from a freer‑flowing filter. If you’re already planning a visual upgrade with a wrap or a new paint job from Nottingham Car Wraps & Styling, a K&N filter adds a subtle performance cue that matches the fresh look.
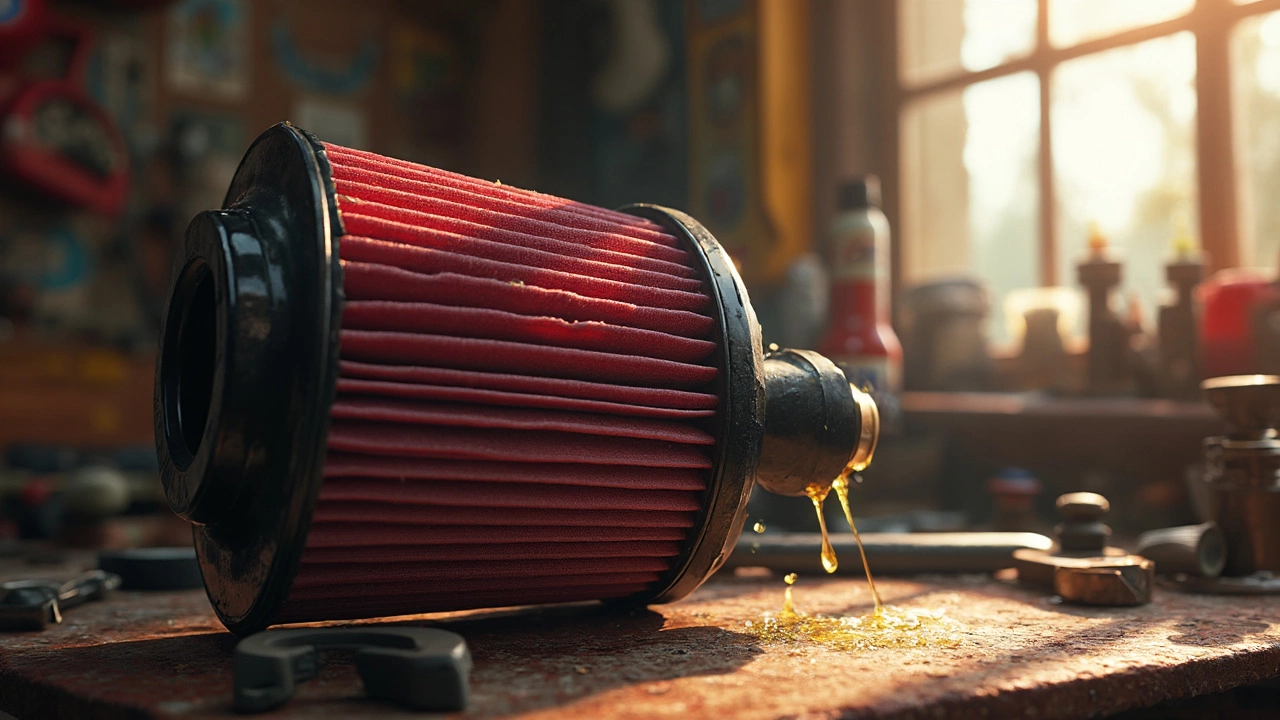
How to Install a K&N Filter – A Quick Walkthrough
Installation is straightforward and can be done with basic tools. First, pop the hood and locate the factory air box. Most K&N kits include a replacement air box or a simple adapter. Remove the old filter, clean out any loose debris, and drop the new K&N filter in place. If the kit uses a separate air box, secure it with the supplied bolts and reconnect the intake hose.
Double‑check the seal – the filter should sit snugly without any gaps. A loose filter can let unfiltered air in, which defeats the purpose. Once everything is tight, start the engine and listen for that smoother throttle response. That’s a good sign the filter is doing its job.
Tip: Keep a small container of K&N’s re‑oil spray in your garage. You’ll need it whenever you clean the filter.
Cleaning and maintaining a K&N filter is almost as easy as the install. After about 20,000 miles (or when you notice a drop in performance), take the filter out, tap off loose dirt, and rinse it with low‑pressure water. Let it dry completely – no heat or direct sunlight – then spray a light coat of oil on both sides. The coating should be even but not dripping; you’ll see a slight sheen when it’s right.
Re‑install the filter and you’re back to peak flow. Many owners report that a clean K&N filter restores the original power boost even after years of use. It’s a tiny habit that pays off.
While K&N filters excel in most street cars, they’re not a one‑size‑fits‑all solution. If you run a highly tuned turbo or a race engine, you may want an even more aggressive filter or a standalone intake system. For everyday drivers and modest performance builds, a K&N filter hits the sweet spot between power, cost, and longevity.
Bottom line: a K&N filter gives you a modest power lift, a distinctive sound, and a reusable part that saves cash in the long run. Installation is simple, maintenance is quick, and the results are noticeable every time you press the pedal. Pair it with a fresh car wrap from our Nottingham studio, and you’ll have a ride that looks and feels brand new.
Ready to upgrade? Browse our blog for more K&N filter articles, check out installation videos, and feel free to ask our team any questions you have about fitting it on your specific model.
Thinking of swapping your stock filter for a K&N? This article looks at the upsides and downsides of K&N filters, with real experiences from car owners and mechanics. Get the facts on performance gains, maintenance, cost, and long-term reliability. Find out if a reusable cotton filter really changes the way your car runs, and what you need to watch out for if you’re considering the switch. No sugarcoating—just practical advice.
Wondering whether you need to oil your K&N air filter? This article provides essential insights into the importance of oiling these filters to maintain their performance and efficiency. Learn about the benefits of oiling, how often it should be done, and common mistakes to avoid. Explore tips for keeping your K&N filter in top shape and extend its lifespan. Find out about alternative options if you prefer a low-maintenance approach.